Failed Roof Inspection: Repairs and Next Steps
A failed roof inspection can feel like the moment a sale, refinance, insurance review, or repair plan stops cold. It does not have to stay stuck. The fastest path forward is to turn the report into a documented repair scope, fix the items that matter most, and schedule the right re-inspection before deadlines tighten.
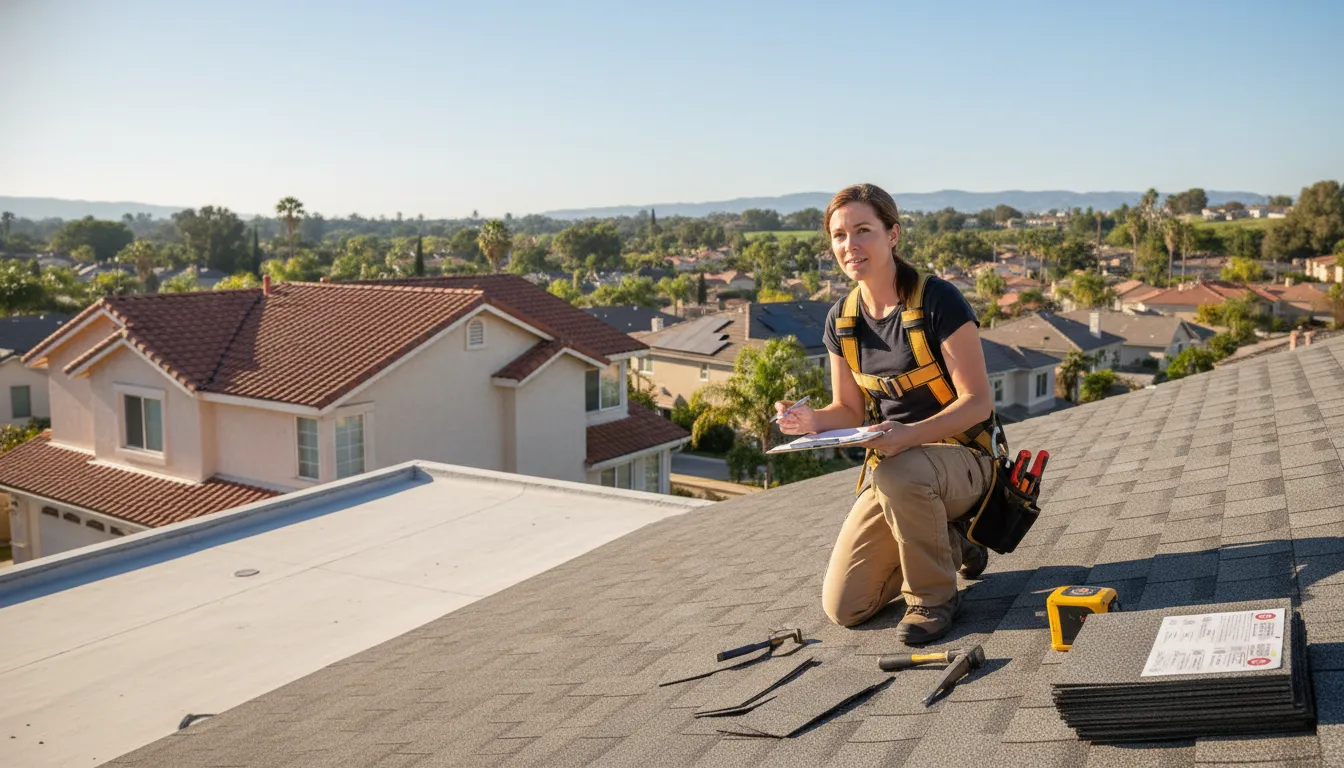
Request an appointment with Cert-A-Roof to review the report, document roof inspection repairs, and plan the next inspection step.
A failed roof inspection means the inspector found conditions that prevent the roof from meeting the requested standard, not that replacement is automatic. Start by reviewing the report and photos for active leaks, damaged materials, flashing failures, ventilation concerns, and other items ranked by severity. Urgent water entry or safety problems should be addressed first. The National Academies review links damp indoor environments with respiratory symptoms, so active leaks should not wait. Keep documentation for buyers, lenders, or insurers, since the completed work and follow-up report may affect the transaction. After a qualified roofer confirms the scope, choose targeted repairs or replacement, then schedule re-inspection to determine whether certification can be issued.
The immediate question is which listed defects matter now and which decision supports your sale, insurance requirement, or long-term roof plan. The next section, Failed roof inspection repairs: first steps, starts with the report, clear priorities, and the right documented follow-up action. Here’s how.
Failed roof inspection repairs: first steps
A failed roof inspection does not always mean the roof needs full replacement. It means the current condition or records do not support the requested next step. In a sale, that may mean repairs, more review, or new documents before the roof can be accepted.
Cert-A-Roof approaches this step as an evidence review, not a pressure sale. The goal is to identify whether the roof can be repaired. If not, a broader roof replacement discussion may be more honest. The same review also clarifies what documentation a buyer, lender, insurer, or property owner needs next.
Schedule a roof inspection and certification review
If your report needs a qualified follow-up, Cert-A-Roof can review the findings, explain the repair path, and document the next step.
Start with the report, not a guess
Stay calm and read the full report before you call for work. Start with the summary, photos, marked locations, and any note about certification or a sale deadline. Then list each finding by location and type. This helps you separate a missing record from a roof defect.
A failed roof inspection often fits one or more of these practical groups:
- Documentation: prior repair records, permits, photos, or proof of completed work may be missing.
- Maintenance: debris, drainage trouble, loose flashing, or worn sealant may need attention.
- Active leak: current water entry or wet areas require prompt review and a repair plan.
- Roof condition: widespread wear or failed materials may call for a replacement discussion.
If the report lists active water entry or wet indoor areas, address that finding first. A review available through NCBI found evidence linking damp indoor spaces with asthma and respiratory symptoms. Protect the interior and ask for a clear repair scope before certification work moves ahead.
Match the issue to the next step
A documentation issue may be resolved by gathering invoices, permits, prior reports, or repair photos. Do not assume paperwork alone will clear a failed roof inspection. If the report also lists physical defects, those items still need review and, when needed, repair.
Maintenance findings can be narrow, but they should not be brushed aside. Ask which items prevent approval now and which are longer-term care items. That distinction helps a seller discuss corrections clearly. It also gives a buyer a better view of immediate roof needs.
For an active leak, focus first on stopping water entry and recording the affected area. Ask whether the repair scope includes flashing, valleys, pipe penetrations, or damaged roof material. If the roof shows broad age-related failure, request a repair-versus-replacement explanation instead of approving patchwork without context.
Keep the transaction tied to evidence
In a real estate or certification setting, the report is the working document for the next conversation. Share it with the proper transaction parties, then confirm what proof will be needed after work is done. That may include repair records, new photos, or a re-inspection result.
Do not treat a repair estimate as a passing certification. A roof should be reviewed again after the listed concerns are corrected, when certification is required. Clear records help buyers, sellers, and agents move forward without guessing about the roof’s current status.
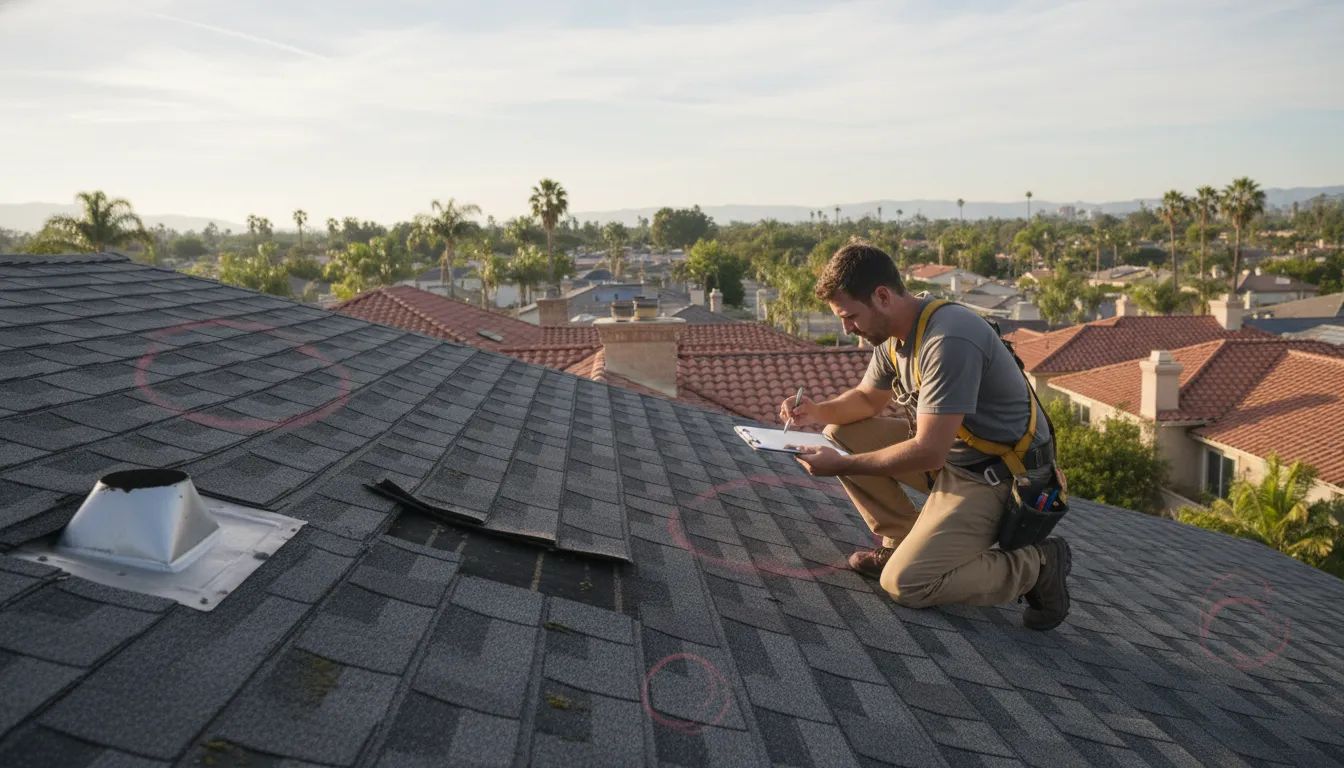
How to read the roof inspection report
Start with the summary and severity ratings, then match each noted defect to its photo and location. A failed roof inspection is easier to act on when you separate evidence from next steps. Cert-A-Roof reports show documented conditions, repair scope, and whether re-inspection may be suitable after corrections.
Photos, locations, and severity ratings
Read each photo caption as a map. Note the roof plane, slope, edge, valley, vent, skylight, chimney, or pipe penetration shown. A close-up may show the defect. A wider photo should help locate it. For more detail, see this guide to understanding your inspection report.
Next, group items by severity. An active leak or open entry point needs attention before worn materials that still shed water. Missing, cracked, slipped, or lifted shingles and tiles should be read with their locations. Also look for failed sealant, exposed fasteners, and flashing gaps beside walls or roof openings.
- Active leak evidence: Look for damp decking, ceiling stains, wet insulation, or noted water entry.
- Drainage details: Review valleys and gutters for debris, damage, ponding signs, or poor water flow.
- Roof openings: Check flashing around vents and skylights, since these are detailed transition areas.
Interior and attic findings
The rooftop pages show exterior wear. The interior and attic pages help show whether water has reached the building. Compare each ceiling stain or attic moisture note with the roof area above it. A National Academies evidence review links damp indoor conditions with asthma and respiratory symptoms.
Do not assume every old stain proves a current leak. Look for words such as active, damp, wet, deteriorated, or prior repair. Then ask which finding caused the failed rating. This helps you focus repairs on observed defects, not parts the report did not flag.
Repair scope and possible certification
Finish with the repair recommendations. Separate isolated fixes, such as replacing damaged tiles or correcting flashing, from wider findings across a roof surface. A clear scope should connect each repair to a documented condition. It should also state whether further review is needed after repairs are complete.
Certification is not automatic after a failed result. The report can guide the work, but qualifying repairs must be completed before a roof may pass re-inspection. If follow-up is required, scheduling a professional re-inspection gives the transaction team a documented next step.
Which roof inspection repairs come first?
Start with active leaks, safety hazards, loose materials, and water-entry points before cosmetic or routine maintenance items. Once urgent risks are stable, use the inspection report photos and locations to group repairs by roof area. Document completed work, and schedule re-inspection if certification or closing approval depends on it.
Immediate hazards and active leaks
A failed roof inspection does not make every defect an emergency. Start with conditions that can harm people or let water keep entering the home. Active leaks, unstable roof areas, and loose material above walkways need prompt attention before smaller maintenance items.
Moisture intrusion follows close behind because the damage can continue out of sight. Damp indoor spaces are linked with respiratory symptoms and asthma, as noted in a review of indoor dampness and health. Stained ceilings, wet attic decking, or damp insulation should lead to finding and stopping the water path.
Repair priorities in the report
Once immediate risks are addressed, use the inspection report to build a repair scope. Photos, locations, and severity notes help separate a leak source from nearby wear. A clear scope also helps owners seek roof inspection repairs that match the documented findings.
| Finding. | Priority. | Reason to act. | Typical next step. |
|---|---|---|---|
| Active leak or unsafe condition. | First. | Water entry or safety risk is present. | Protect area and arrange repair. |
| Moisture intrusion. | Urgent. | Hidden damage may continue. | Locate entry point and dry affected area. |
| Failed flashing. | High. | Open joints can admit water. | Repair flashing at walls or penetrations. |
| Missing or damaged roofing material. | High. | Exposed areas lose weather protection. | Replace damaged surface components. |
| Drainage or gutter issue. | Next. | Water may back up or spill poorly. | Clear, correct, or repair drainage. |
| Ventilation or cosmetic finding. | Planned. | May affect upkeep or appearance. | Schedule review after core repairs. |
Flashing is the metal or sealed detail around walls, skylights, valleys, and pipe penetrations. When it fails, rain may reach the roof assembly even if most roofing material looks intact. Gutters and drainage come next unless backed-up water is already causing entry or unsafe overflow.
For a seller, this order creates a useful repair record rather than a list of unrelated fixes. Work that stops water or removes a hazard should not wait behind paint, staining, or surface appearance. The report should show which defects need correction before another review.
Repair, replacement, and re-inspection
Cosmetic marks, minor surface wear, and other non-leaking findings usually come after water and safety work. Ventilation concerns also deserve a plan, especially when attic moisture appears in the report. Their timing depends on whether the inspector found active damage or a maintenance need.
After priority repairs, keep invoices, photos, and any updated work scope with the original report. If the repair scope becomes broad, the owner may also need to compare repair with replacement. The next step is scheduling a professional re-inspection to confirm whether the cited defects were corrected.
Should you repair or replace the roof?
Repair is usually the better first option when defects are isolated, the roof still has service life, and the report lists correctable items. Replacement becomes more realistic when wear is widespread, leaks recur, materials are near end of life, or a buyer, lender, or insurer needs broader confidence.
| Decision point | Repair may fit when… | Replacement may fit when… |
|---|---|---|
| Damage pattern | Defects are isolated to one area, flashing detail, or small material group. | Wear or failures appear across several roof planes or key system areas. |
| Leak history | The leak source is clear and can be corrected with targeted work. | Leaks keep returning after prior patches or multiple areas show moisture risk. |
| Roof age and condition | The roof still has useful service life and surrounding materials are sound. | The roof is near end of life or brittle materials make durable repair unlikely. |
| Transaction needs | A documented repair and re-inspection can satisfy the buyer, lender, or insurer. | The transaction needs broader confidence than a limited repair can provide. |
Schedule roof inspection repairs if the report lists correctable defects, active leaks, flashing issues, or other targeted repair items.
Start with the scope of damage
A failed roof inspection does not always mean you need a new roof. Start with the report, photos, and the locations of each defect. A few damaged shingles or a failed flashing detail may support a focused repair. Damage across several roof planes points to a wider problem.
Look at how much of the roof is affected, not just the worst spot. Ask whether the defect is isolated or linked to worn materials across the system. If the report notes active moisture inside the home, act promptly. Damp indoor spaces are linked with breathing health risks, according to the National Academies review on indoor dampness.
Compare repair value with replacement need
Repair may make sense when the roof has useful service life left and the defect can be fixed in one area. This may include loose flashing, an isolated leak, or a small group of failed materials. Cert-A-Roof’s roof inspection repairs page explains how repair work follows recorded roof findings.
Replacement may make more sense when wear is broad or leaks keep returning. It may also be right when past patching did not solve the cause. Roof age matters because an older system can develop more weak points after one repair. The issue is whether a patch gives the owner and buyer clear confidence in the full roof.
Need a clear next step after a failed roof inspection? Request an appointment with Cert-A-Roof to review the noted defects. The team can define repair scope and plan re-inspection after work is complete.
Account for the sale and lender review
In a home sale, the right choice must also fit the transaction. A buyer may accept recorded repairs when limited issues are fixed. A lender, insurer, or buyer may need proof that the roof concern was addressed before closing. Sellers should ask which report, receipt, or follow-up inspection must be provided.
When an inspection shows broad wear, replacement may prevent more debate about separate repairs. Review Cert-A-Roof’s roof replacement options when large sections are failing or leaks have returned. After either path, re-inspection can record completed work. It can also show whether any issues still need attention.
Use the inspection as a decision tool, not a reason to guess. Match the work to the damage, roof condition, and sale documents needed. This approach keeps decisions focused and gives each party a clear record of corrected work.
What happens during re-inspection and certification?
During re-inspection, the inspector checks whether the documented roof defects were repaired, reviews visible conditions, and compares current findings against the original report. If the roof meets the applicable standard, the owner can receive updated documentation or certification for the transaction, lender, insurer, or maintenance file.
After repairs from a failed roof inspection are complete, the next task is proof. Keep the original report, repair invoices, paid receipts, material details, and clear before-and-after photos. These records help the inspector match completed work to each listed defect.
Records to gather before the return visit
A re-inspection is easier when the inspector can trace each repair. Ask the contractor to note the repaired area, such as flashing, shingles, valleys, vents, or pipe penetrations. If interior stains or attic moisture were noted, keep photos of the corrected source and related work.
Save these items together in one file that can be shared before the appointment. Include the repair proposal, approved changes, invoices, warranties if provided, and photos from the work. A clear record reduces confusion when one reported defect needed more than one repair.
Moisture matters beyond the roof surface. A National Academies review found an association between damp indoor environments and respiratory symptoms. The review is available through the National Center for Biotechnology Information. Repair records should address leak paths and visible indoor effects noted in the first report.
Steps in the re-inspection process
The follow-up visit is not a new promise of certification. It is a check of the repair scope and the present roof condition. Homeowners and sellers can prepare for scheduling a professional re-inspection with these steps:
- Organize the repair file. Match invoices and photos to items in the failed report. Note any work that changed from the recommended scope.
- Set the re-inspection appointment. Share the report and repair records before the visit. Mention any sale, lender request, or insurance need tied to the documentation.
- Provide access to reviewed areas. The inspector may need to view roof surfaces, attic evidence, ceilings, flashing, valleys, vents, skylights, and repaired leak points.
- Let the inspector verify corrections. Completed repairs are compared with the documented defects. Any remaining concern can be recorded for more work.
- Receive updated documentation. If the corrected roof meets the applicable inspection requirements, it may qualify for certification or an updated report.
Before the return visit, remove obstacles that limit access to the attic or affected interior rooms. Have the repair file ready to send or show. If weather or safety prevents a full review, ask what still must be checked.
Certification for the next decision
A roof certificate is not issued just because invoices exist. The roof must meet the inspection standard at the time of review. If a concern remains, the updated report should identify the next repair or further evaluation needed.
For a seller, updated documentation can show a buyer what was repaired and checked. Provide the report if a lender or insurer asks to review it. If more work is required, review available roof inspection repairs before scheduling another check.
Keep the final report with invoices and photos after the transaction ends. This file can help explain prior work during later maintenance or a future inspection. It also gives the next reviewer a clear starting point instead of relying on memory.
Who pays after a failed roof inspection?
Payment after a failed roof inspection depends on the purchase agreement, inspection contingency, repair negotiations, lender requirements, and insurance conditions. Sellers may complete repairs, buyers may request credits, or both sides may negotiate another solution. The report documents roof conditions; the contract determines responsibility.
A failed roof inspection identifies roof conditions that need attention, but it does not assign the bill by itself. Payment often depends on the signed purchase agreement, inspection contingency, repair talks, and conditions from a lender or insurer. Market conditions may also shape which option both parties will accept.
Start with the written report, not a verbal promise or rough allowance. Sellers, buyers, and agents need the same list of defects, photos, recommended work, and repair scope. This section explains common paths, not legal advice. Ask a real estate professional or attorney about contract duties in your transaction.
Seller options after the report
A seller may choose to complete agreed repairs before closing. Another path may be a negotiated credit or price change, if the agreement and transaction parties allow it. The right choice can depend on the defect, closing schedule, buyer request, and any lender or insurance condition.
Before negotiating, the seller should know whether the issue calls for a focused fix or broader work. A clear scope helps prevent disputes about what was included. It also gives parties a sound basis for bids and a later re-inspection. Cert-A-Roof’s guide to understanding your inspection report explains what a professional inspection reviews.
Buyer and agent priorities
A buyer should read the roof findings with the purchase agreement and any contingency deadline. The buyer can then discuss available requests with the agent and other advisors. An agent can help track written requests, responses, deadlines, invoices, permits when needed, and proof that agreed work was finished.
A roof issue can also affect approval steps outside the buyer and seller negotiation. Buyers should ask their lender and insurer what roof documents they require before closing or coverage. For more context, review what to do if your roof inspection fails when insurance requirements are part of the transaction.
Some findings need timely attention even while terms are being reviewed. If a report notes water intrusion or damp interior areas, do not treat it as paperwork alone. A National Academies review hosted by NCBI links damp indoor spaces with asthma and respiratory symptoms. Ask for prompt professional review of active moisture conditions.
A documented repair scope
The most useful next step is a written repair scope tied to the inspection findings. It should identify the affected roof areas, the needed corrections, and the records expected after work is done. Photos and completed invoices can help all parties compare the result with the original finding.
That scope does not decide who must pay. It makes the decision clearer. A seller can review the work being requested, while a buyer can see whether the proposed correction addresses the failed roof inspection. Agents can keep the negotiated terms tied to specific work instead of broad promises.
Once the parties agree on a path, keep the report, repair scope, signed changes, receipts, and re-inspection records together. Before closing, confirm that lender or insurer document needs have been met. Written records reduce confusion when deadlines are tight and several parties must review the roof condition.
Frequently Asked Questions
Can I still sell a house if the roof fails inspection?
Yes, a failed roof inspection does not automatically stop a home sale. It can affect negotiations, repairs, credits, or timing. A seller should share the written report and discuss documented repair options with the appropriate transaction professionals. A buyer should review the findings and inspection contingency terms before agreeing to a repair plan or credit. A failed inspection may delay a sale or lead to repair requests.
How does a failed roof inspection affect my insurance?
A failed roof inspection can raise questions about insurability when the report documents leaks, damaged materials, or unresolved hazards. Coverage decisions depend on the insurer, policy terms, roof condition, and requested documentation. Send the report to your insurance contact if it was requested for coverage. Before repairs begin, ask whether the carrier needs photos, estimates, completion records, or a follow-up inspection.
What is a roof certification after repairs?
A roof certification is written documentation issued after a qualified professional evaluates the roof and determines it meets the certification requirements. Repairs alone do not guarantee certification. The roof must be re-inspected after required defects are corrected. A roof certification indicates the roof was inspected and considered sound for a stated period, subject to the certification terms.
Why did my new roof fail inspection?
A newer roof can fail inspection if workmanship, flashing, ventilation, drainage, material installation, or prior damage does not meet inspection requirements. Start with the written report and photo documentation. Then notify the installing contractor and request a written response and correction plan. If a warranty, permit, sale, or insurance issue is involved, keep all records and schedule an independent re-inspection after corrections are complete.
Ready to take the next step after a failed inspection?
A failed inspection can leave repairs unresolved and delay the clear documentation needed for your next decision. Waiting can let known issues remain open while deadlines, sale plans, or protection goals keep moving. Starting now gives you time to review findings, choose a repair path, and plan re-inspection when corrective work is complete.
Ready to move forward with a clear next step? Request an appointment to discuss inspection findings and the right follow-up service. You can then decide what action fits your roof and your timeline. Bring your report and questions so the team can explain repair, replacement, and re-inspection options based on the documented condition. Acting now helps keep the process organized.
Comment (0)