Skylight Inspection Checklist for Leaks and Damage
Skylight Inspection Checklist for Leaks and Damage
A faint ceiling stain after rain may be the first visible clue that water has already slipped past a skylight seal or flashing detail. This skylight inspection checklist helps homeowners separate warning signs they can spot safely from conditions that call for a professional roof inspection before hidden moisture damages framing and insulation.
Request a professional skylight and roof inspection from Cert-A-Roof.
A skylight inspection checklist is the best tool for finding leaks and water damage before they ruin your home and cause very costly repairs. You should start by looking for interior signs like yellow stains, as the Building America Solution Center notes that these units are common leak sources. On the roof, you must check for cracked glass, worn seals, and debris that traps moisture against the metal flashing or use a hose for testing. These simple steps help you decide if you need a repair or a full replacement to protect your house from mold and severe frame wood rot. Frequent checks ensure that your roof stays dry and that your property remains safe and comfortable for your family throughout every season of the year.
You do not need special tools to find most common skylight problems. Following a clear plan allows you to spot issues from the ground and the roof. We created this Skylight inspection checklist: what to examine to guide you. The path begins with a safe interior review before any exterior evaluation.
Skylight inspection checklist: what to examine
Check the ceiling, skylight glazing, frame, seals, flashing, nearby roofing, and drainage paths; then document any stains, cracks, gaps, corrosion, or trapped debris.
Skylights bring light and air into your home. But they can also let in water if they are not in good shape. A regular skylight inspection checklist helps you find small issues before they become big leaks. These units face harsh sun, wind, and rain every day. Over time, the parts can break down or pull away from the roof. Taking time to look at your skylights once or twice a year can save you a lot of money on repairs.
Spotting leaks from inside
Start your check from inside your house. You do not need a ladder for this part of the skylight inspection checklist. Stand under the unit and look at the ceiling and walls. Look for paint that is peeling or bubbling. Check for yellow or brown stains on the wall. These are clear signs that water is getting past the seals. Even small damp spots mean you have a problem that needs a fast fix. The U.S. Department of Energy notes that skylights often lead to water leaks in homes. Finding these signs early helps you decide if you need a simple repair or a full swap.
You should also look for fog or water between the glass panes. This means the seal that holds the gas inside has failed. A failed seal makes the unit less good at saving power and ruins your view. If you see clouds or drops inside the glass, the skylight is no longer doing its job well. This issue usually means it is time to get a new one. New units offer better air tightness than old ones. Swapping out a bad skylight can help keep your home cool in the summer and warm in the winter.
Checking the roof surface
The next part of your skylight inspection checklist happens on the roof. You should only do this if you feel safe on a ladder. If your roof is steep or high, call for Cert-A-Roof roof inspection services to do the work. On the roof, you want to look at the frame and the flashing. Flashing is the metal part that connects the skylight to the roof. It is the most common spot for a leak to start. Look for gaps, rust, or holes in this metal. Check the roof parts right next to the skylight for any damage or dirt.
Key steps for your check
Follow these steps to finish your check and keep your home dry. Using a garden hose is a good way to find active leaks.
- Look for interior stains. Check the walls and paint around the skylight for any signs of water. Dark spots or peeling paint mean a leak is active.
- Inspect the glass and seals. Search for cracks in the glass or fogging between the panes. These flaws show that the unit is damaged or the seal is broken.
- Check the frame and flashing. Look for rust, gaps, or loose parts on the metal flashing outside. The flashing must be tight against the roof to block water.
- Clear away dirt and leaves. Remove any trash that has built up around the base. Debris can hold water and lead to rot or leaks over time.
- Test the unit with water. Use a garden hose to spray the skylight and the roof near it. Have someone watch from inside to see if any water drips through.
A full check helps you stay ahead of roof trouble. Keeping records is also key. Take photos of anything you find during your skylight inspection checklist. These notes are helpful if you need to file a claim or show an expert what is wrong. If you find a leak, act fast to stop wood rot and mold. Most skylight issues start small but grow quickly if you ignore them. Keeping a regular schedule for these checks is the best way to protect your roof and your home.
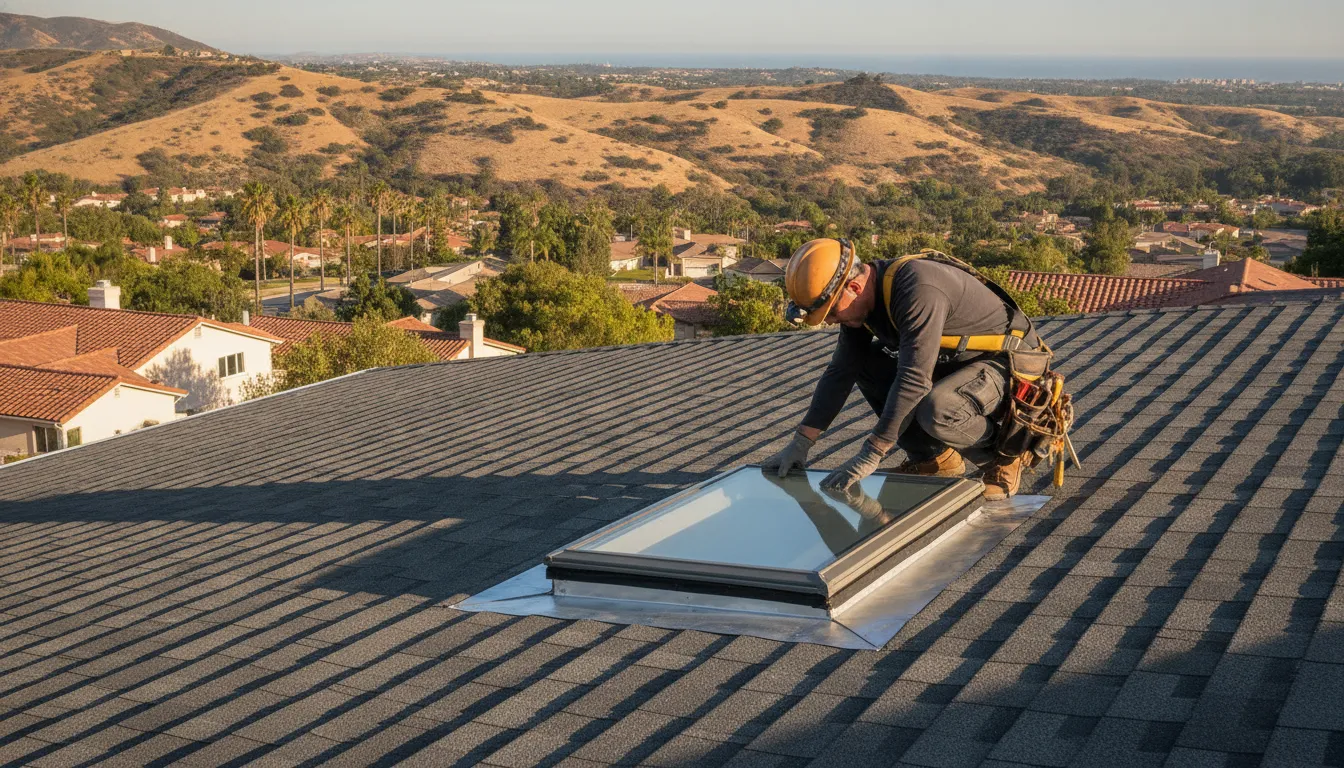
A professional inspection can reveal leaks and roof damage that are difficult to see from the ground.
How is a skylight evaluated during a roof inspection?
A professional evaluates the interior finishes, skylight glazing and frame, perimeter seals, flashing, drainage, and surrounding roof materials before testing suspected leak paths.
A skylight is a common spot for water to enter a home. During a pro roof check, an expert looks at the whole unit to see if it is still sound. This process starts inside the house and moves to the roof surface. Pros use a professional roof evaluation process to find small issues before they become big leaks. They look for wear, poor setup, and signs of water damage that a person might miss.
Checking for inside damage signs
The first step often happens inside your home. An expert looks at the ceiling and walls around the skylight shaft. They search for water stains or peeling paint. These are clear signs of skylight water leaks. Even small spots can mean that water is getting past the seals during heavy rain. These inside signs help the pro know where to focus when they climb onto the roof later.
Sometimes the damage is hidden behind the wall. A pro might use tools to check for wet spots that you cannot see with your eyes. They want to find out if the wood frame is wet or starting to rot. This part of the check is key because inside stains often show up long after a leak has started. Finding these clues early can help you decide if you need a simple fix or a new unit.
Inspecting the outside unit and flashing
Once the inside check is done, the expert goes up on the roof. They use a skylight inspection checklist to look at the glass, the frame, and the seals. A pro looks for a few key things during this part of the job:
- Cracks in the glass or acrylic dome.
- Dry or brittle seals around the frame.
- Rust or holes in the metal flashing.
- Debris like leaves that trap water against the unit.
- Missing or loose roof tiles near the skylight.
The flashing is the most key part of the outside check. Flashing is the metal or plastic used to guide water away from the skylight. If the flashing is bent, rusted, or set up wrong, the unit will leak. Experts check how well the water control layers work with the roof parts. Good flashing is the main defense against water getting into the house. They also look at the roof tiles near the skylight to ensure they are in good shape.
Testing for active leaks
If there is a suspected leak, a pro may perform a water test. They use a garden hose to spray water on the skylight and the roof around it. One person stays inside to watch for drips while the other person sprays the outside. This is a good way to find the exact source of a leak. It shows how the unit acts when it rains. This test helps the expert give you a clear plan for a fix.
This test also helps check the drainage around the frame. If water pools around the skylight, it puts more stress on the seals. A pro will look to see if the water flows away fast or sits in place. After the test, the expert writes a report. This report helps you know if you need to fix the flashing or buy a new skylight. Regular checks like this keep your home dry and safe from water damage.
Common skylight leak sources and what they mean
Most skylight leaks begin at failed flashing, deteriorated perimeter seals, damaged glazing, or blocked drainage; nearby roof defects can also send water toward the opening.
Skylights are often common spots for water to enter a home. A leak can cause big problems if you do not find it fast. Checking for leaks is a key part of your Cert-A-Roof professional inspections to see if you should fix or replace the unit. Many times, the spot where you see water is not where the leak starts. This is why a full check is needed to keep your home dry and safe.
Issues with flashing and seals
Flashing is the metal part that connects the skylight to the roof. It is the most vital layer to keep water out. Step flashing, head flashing, and sill flashing must all work together. If these parts are not set up right, water will find a way in. Over time, the metal can rust or pull away from the roof. This creates gaps where rain can seep into your attic or ceiling.
Sealants and gaskets are also common fail points. These parts use rubber or glue to keep the glass tight to the frame. Heat from the sun can make these parts dry and crack. Once a seal fails, water can get past the glass and drip into your room. You should look for peeling paint or stains on the wood frame. These are clear signs of water infiltration near the skylight.
| Leak Source. | Common Sign. | Risk Level. |
|---|---|---|
| Flashing. | Stains on the ceiling frame. | High. |
| Sealant. | Active drips during light rain. | Medium. |
| Glass Glazing. | Fogging or water between panes. | Low to Medium. |
| Drainage. | Water overflow at the edges. | Medium. |
Clogged drainage and glass damage
Skylights have small paths to let water run off the roof. These drainage channels can get clogged with leaves or dirt. When water cannot flow away, it pools around the frame. This standing water can in time push past the seals. Keeping these paths clear is a simple but vital task for your home. You can test for leaks by spraying the area with a garden hose to see how the water flows.
The glass or plastic dome can also have issues. Large hail or falling branches can cause small cracks. These cracks may not leak right away, but they get worse with time. If you see fog between the panes of glass, the seal is likely broken. This means the unit is no longer airtight and may lose heat. A new unit can help with energy efficiency and stop future leaks.
Why the entry point is hard to find
One of the hardest parts of a leak check is finding the source. Gravity pulls water down and along paths you cannot see. A drip in the middle of your floor might start several feet away on the roof. Water can run down a rafter or a beam before it falls. This can lead you to look in the wrong spot for the crack or gap.
Nearby roof damage can also look like a skylight leak. A broken shingle or a bad vent near the unit might be the real cause. That is why a pro check is so helpful. Pros use tools to track the water back to its true start. Finding the right source saves you time and money on repairs. Do not just patch a spot that looks bad without a full plan.
What warning signs can homeowners spot safely?
From indoors or the ground, watch for ceiling stains, peeling paint, musty odors, fog between panes, visible cracks, debris buildup, and displaced roofing near the skylight.
You do not need to climb onto your roof to find skylight issues. Many signs of damage show up inside your home or are clear from the ground. Adding a few simple steps to your Cert-A-Roof professional inspections can help you find leaks before they cause big repairs. Catching these problems early saves you money and keeps your home dry.
Indoor leaks and stains
Water damage often shows up on your ceiling or walls first. Look for yellow or brown stains near the edges of the skylight frame. You may also see paint that starts to bubble or peel away. These marks are clear signs of water entry that needs your care. If you spot these signs, it is time to look closer at the unit’s seal.
As energy experts at the DOE say, checking for stains and peeling paint is a key way to find leaks. You should also check for musty smells or damp spots in the room. Sometimes, you might see water drips or heavy fog on the glass. Water drops between glass panes often mean the seal has failed.
Outdoor visual checks
You can see many outdoor issues while standing safely on the grass. Use a pair of binoculars to get a better look at the roof. Look for debris like leaves or twigs that sit against the skylight frame. Piles of trash can trap water and rot the seals over time. You should also look for moss or green growth near the glass.
Check the glass for any cracks or chips. Even a small chip can grow into a large crack during a storm. Look at the shingles near the base of the unit too. If they look curled or are missing, water can get under the flashing. Proper flashing is needed for a dry roof system because it moves water away from the opening. If the flashing looks loose, you may need a repair.
Urgency and next steps
Some warning signs need faster action than others. A small water stain might wait a few days, but active drips need help right away. Water that gets into your walls can cause mold to grow fast. If you see water during a storm, cover your floors and call a pro. Do not wait for the next rain to fix a known leak.
You should check your skylights at least once a year. The best times are in the spring and fall. It is also smart to look after a big wind or hail storm. If you find any damage, a professional Cert-A-Roof certification guidance can give you peace of mind. An expert can find small gaps that you might miss from the ground.
Contact Cert-A-Roof when a stain, drip, or damaged skylight needs professional evaluation.
When should you schedule a professional inspection?
Schedule a professional inspection after active leaking, storm damage, visible flashing movement, recurring stains, unsafe roof conditions, or any temporary patch that has not solved the source.
Checking your roof for leaks is a vital part of home care. Many people wait until they see water on the floor to call for help. But waiting too long can lead to costly repairs. A pro can find small issues before they grow into big ones. You should look for a firm that uses a skylight inspection checklist to ensure every part is safe.
Signs you need a fast check
If you see signs of water inside your home, you need to act fast. Look at the walls and ceiling around the unit. You might see peeling paint or dark stains on the wood frame. These are clear signs that water is getting in where it should not. These leaks often start at the edge of the glass or near the roof line.
As the U.S. Department of Energy notes, checking for stains and peeling paint is a key step to find water leaks early. If you spot these marks, the seal has likely failed. A pro will check the unit and the roof around it to find the source. They might even use a hose to see where the water flows and find the leak source.
The danger of quick fixes
Some owners try to fix leaks with a tube of caulk or a patch. This might stop the drip for a few days, but it is often a bad idea. Quick fixes can hide real damage to the roof deck or the flashing. Flashing is the metal strip that keeps water from getting under the roof. If the flashing is rusted or bent, caulk will not fix the root cause.
Masking the leak can lead to wood rot that you cannot see from the outside. A full check ensures the unit is well-joined to the roof’s water layer. If you just cover a crack, you might miss a bigger problem with how the unit sits on the roof. Expert checks help you decide if you should repair or replace the unit to keep your home dry.
Key moments for a professional review
You do not have to wait for a leak to call a pro. It is smart to schedule a check once a year. The best times are in the spring or fall. You should also get a check after any big storm with high winds or hail. Large storms can crack the glass or pull the seals away from the frame. This can lead to a sudden leak the next time it rains.
If you are buying or selling a home, a professional review is a must. Lenders and insurance firms often want to see a Cert-A-Roof certification guidance before they close the deal. This report proves the roof and its units are in good shape. It gives the buyer peace of mind and helps the seller close the sale faster. A pro check can find issues that a general home inspector might miss.
How to maintain a skylight between inspections
Keep the glass and surrounding drainage area clear, monitor interior finishes after storms, record changes with photos, and avoid using surface caulk as a substitute for diagnosing failed flashing.
Keeping your skylights in good shape is a year-round job. While experts visit once or twice a year, you can do a lot to protect your home. Regular care keeps the glass clear and stops water from seeping into your walls. It also helps you stay ahead of small issues before they turn into costly leaks. By checking your roof often, you can make sure your home stays dry through every season.
Watch for early signs of water damage
The best way to start is by looking at your ceiling from the inside. You should do this check at least once a month. Look for peeling paint or dark stains on the drywall or framing around the glass. These marks are clear signs that water is getting through the seals. If you see damp spots, you should act fast. You may need to call for Cert-A-Roof roof inspection services to find the exact source. Finding these signs early can save you from big mold or rot problems later.
Clear debris to prevent clogs
Dirt, leaves, and twigs often pile up around the edges of a skylight. These items can trap water and block the paths where it should run off. When water sits in one spot, it puts pressure on the seals and the roof. You can use a soft brush on a long pole to clear these piles from the ground. This keeps the water control layers around the frame working well. It is also wise to check your gutters at the same time. This keeps the whole system moving water away from your home.
Use a simple skylight inspection checklist
You should perform a full review before the rainy season starts. A basic **skylight inspection checklist** helps you track the health of your window. Start by checking the glass for any small cracks or chips. Then, you can use a garden hose to test the unit for leaks. Spray water over the frame and the roof top to test for water leaks safely. Have someone inside the home watch for any drips while you spray. Keeping notes of these tests is helpful for your records and for future repairs.
Plan care with your roof upkeep
Keeping your skylight working well is best when you pair it with regular roof care. Check your shingles and flashing whenever you clear the debris from your skylight. If you notice loose tiles or damaged metal, you should fix them right away. This joint approach ensures that no part of your roof is weak. It is much easier to clean your skylights when you are already doing other yard work. Setting a fixed schedule helps you remember these tasks so you never miss a check.
Get help identifying the source of a skylight leak before approving a temporary patch.
Frequently Asked Questions
What should be included in a skylight inspection checklist?
A thorough skylight inspection checklist should cover both interior and exterior components. On the inside, look for water stains, peeling paint, or damp framing. Outside, check for cracked glass or acrylic, damaged seals, and clogged weep holes. According to the U.S. Department of Energy, you should also test for leaks by spraying the unit and surrounding roof with a garden hose to find active water entry points.
How do you identify common skylight leak sources?
Most skylight leaks start at the flashing or the waterproof seal between the glass and the frame. Over time, debris like pine needles or leaves can trap moisture against these seals, causing them to fail. To find the source, check for gaps in the metal flashing that integrates the skylight into your roof. Proper flashing is vital for keeping water out. If you see condensation between glass panes, the seal has likely broken, which often leads to leaks.
How often should you schedule a professional skylight inspection?
Roofing experts suggest having your skylights professionally checked at least once per year, usually in the spring or fall. It is also wise to book an inspection after a major storm with heavy rain, wind, or hail. Regular checks help homeowners catch small issues before they lead to costly water damage. A professional roof inspection ensures your skylights stay watertight and helps you decide if a repair or a full replacement is the best choice.
What are common signs of skylight damage?
Common signs of damage include visible cracks in the lens, yellowed acrylic, and rusted or corroded metal frames. Inside your home, you might notice dripping water, bubbling drywall, or dark spots on the ceiling near the skylight. If your skylight looks foggy or has trapped moisture, the factory seal has failed. These issues can reduce energy efficiency and cause heat loss. Catching these warning signs early can prevent structural rot in your roof framing and attic.
Ready to schedule a professional skylight and roof inspection?
Ignoring a skylight leak today often leads to high repair costs and deep inside damage that you can simply avoid with a quick check. Booking your inspection now helps you fix small gaps in your flashing before the next big storm turns them into a major home crisis. Our expert team uses advanced tools to find hidden flaws so you can keep your home safe and dry without the stress of sudden leaks. Taking this simple step today ensures your roof stays strong and helps you stay ahead of any costly upkeep needs for years to come.
Ready to schedule a professional skylight and roof inspection? Schedule a professional skylight and roof inspection today to protect your home.

Comment (0)