Leaking Skylight Temporary Fix: A Simple Guide
Think of a leaking skylight as an injury to your home. Before you can call the doctor—in this case, a professional roofer—you need to administer first aid to stop the bleeding. A quick and effective patch is your home’s bandage, designed to prevent the problem from getting worse. This guide is your first-aid manual. We will show you exactly how to create a leaking skylight temporary fix using simple materials from the hardware store. From identifying the source to choosing the right sealant, these steps will empower you to protect your property while you arrange for a permanent, professional repair.
Key Takeaways
- Act quickly to contain the mess and stay safe: Your first move should be to catch the drip, protect your belongings, and document the damage. If water is near any wiring, shut off the power to that area at the circuit breaker for safety.
- Understand the limits of a temporary fix: Using materials like waterproof tape or a tarp can stop a leak in an emergency, but these patches won’t hold up over time and don’t fix the root problem, such as failed flashing or degraded seals.
- A professional repair is the only permanent solution: A certified expert can accurately diagnose the true cause of the leak—which is often hidden—and provide a lasting repair that protects your home from long-term issues like mold and structural rot.
Why Is My Skylight Leaking?
That tell-tale drip, drip, drip from a skylight is enough to make any homeowner’s heart sink. You installed it to let the beautiful California sun in, not the rain. A leaking skylight is more than just an annoyance; it can lead to water damage, mold, and structural issues if left unchecked. The good news is that once you understand the common causes, you can figure out your next steps. Most leaks trace back to just a few key problems, from aging materials to issues with the original installation. Let’s walk through the most likely culprits behind your leaky skylight.
Damaged Flashing
Think of flashing as your skylight’s personal raincoat. It’s the thin metal material installed around the skylight’s frame where it meets the roof, designed to direct water away from the opening. When this flashing is damaged, cracked, or pulled away from the roof, it creates a direct path for water to seep in. Over time, exposure to the elements can cause flashing to corrode or warp. You can often spot the problem by looking for visible cracks, gaps, or rust around the skylight’s exterior. Inside, you might see water stains on the ceiling, which are clear signs that the flashing has failed its one job. A thorough roof inspection can confirm if your flashing is the source of the leak.
Cracked Glass
While it might seem obvious, a crack in the skylight pane itself is a common reason for leaks. This damage isn’t always from a dramatic event like a fallen tree branch; years of harsh sun, temperature fluctuations, and even hail can cause stress fractures to form. Even a hairline crack that’s barely visible can allow a surprising amount of water to get through during a rainstorm. If you notice water dripping directly from the center of the skylight or see visible cracks in the glass, this is likely your issue. It’s important to address this quickly, as a small crack can easily spread and compromise the entire pane, turning a small repair into a full replacement.
Worn-Out Seals
Your skylight has weatherproof seals around the edges of the glass pane to create a watertight barrier. Just like the rubber seals around your car windows, these can degrade over time. Constant exposure to UV rays and changing weather causes them to become dry, brittle, and cracked, breaking the watertight seal. One of the biggest clues that your seals are failing is condensation building up between the glass panes, making the skylight look foggy. This means the airtight seal is broken, allowing moisture in. If you see this, or notice water stains forming right around the frame, worn-out seals are probably to blame for your leak.
Faulty Installation
Unfortunately, many skylight leaks are simply due to a poor installation job from the start. If the skylight wasn’t set at the correct pitch, sealed improperly, or if the flashing was installed incorrectly, it was only a matter of time before problems appeared. A faulty installation creates vulnerabilities that rain will eventually find. Signs of this can include drafts coming from around the skylight, in addition to the more obvious water stains and drips. This is why choosing an experienced professional for any skylight services is so critical. A proper installation ensures every component works together to keep your home dry for years to come.
Leaky Skylight? Your First 4 Steps
That tell-tale drip, drip, drip from a skylight is a sound no homeowner wants to hear. It’s easy to feel a wave of panic, but taking a few immediate, measured steps can make a huge difference in protecting your home from further damage. Before you even think about a temporary patch, you need to assess and control the situation. Think of it as first aid for your home. These initial actions will not only minimize the mess but also provide crucial information for when you call in a professional for a permanent fix. Here’s exactly what to do the moment you spot a leak.
1. Contain the Drip and Protect Your Home
First things first: grab a bucket or a large bowl to catch the water. Place it directly under the drip to protect your floors. If the leak is widespread, use towels or tarps to cover any furniture, rugs, or electronics in the vicinity. Once you’ve contained the immediate mess, take a closer look at the skylight itself. Try to identify where the water is coming from by looking for obvious cracks, gaps around the frame, or water stains on the ceiling. Pinpointing the source can be tricky, but any information you gather will be helpful. This initial step is crucial for damage control while you figure out your next move for a proper skylight repair.
2. Document the Damage
Now that the drip is contained, become a detective. Grab your phone and start documenting everything. Take clear photos and videos of the leak, the water damage on your ceiling and walls, and any affected belongings. Capture the scene from multiple angles, both close-up and from a distance, to show the full extent of the problem. This evidence is incredibly valuable, especially if you need to file an insurance claim. It also gives your roofing professional a head start before they even arrive. Make a few notes about when you first noticed the leak and how heavy the rainfall is. Having a detailed record helps ensure your roof inspection is as thorough as possible.
3. Check for Electrical Hazards
This step is all about safety. Water and electricity are a dangerous combination, so you need to be cautious. Look around the leaking skylight for any light fixtures, ceiling fans, or visible wiring. If water is dripping near any electrical components, it’s best to shut off the power to that area immediately. You can do this at your home’s main circuit breaker panel. If you’re not sure which breaker controls that part of the house, it’s better to be safe and turn off the main power. Don’t touch any wet electrical fixtures or switches. When in doubt, your safety is the top priority, so don’t hesitate to call a qualified electrician to assess the situation.
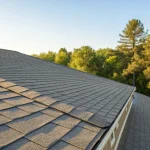
4. Clear Debris from the Skylight
If you can safely see the top of your skylight from a window or the ground, check for any obvious blockages. Sometimes, a buildup of leaves, twigs, or other debris can trap water on the roof, forcing it to seep through the skylight’s seals. If you can safely reach and clear this debris with a broom, it might provide some temporary relief. However, please do not get on your roof, especially while it’s raining. A wet roof is incredibly slippery and dangerous. Clearing minor debris is one thing, but diagnosing and fixing the root cause is a job for an expert. A professional roof certification inspection can identify if debris is the culprit or if there’s a more serious issue at play.
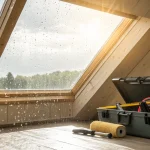
Your Temporary Repair Toolkit
Before you can tackle a temporary fix, you need to gather the right supplies. Having a small emergency kit ready can save you a lot of stress when a leak appears. Most of these items are easy to find at your local hardware store. Think of this as your first-aid kit for your roof—it’s designed to stop the bleeding, not perform surgery. The goal is to create a water-tight, temporary seal that will hold until a professional can assess the damage and provide a permanent solution. Remember, these are stopgap measures, but having the right materials on hand makes all the difference in protecting your home from further water damage while you wait for help.
Essential Materials
Your go-to materials for a quick patch are all about creating a strong, waterproof barrier. Start with a heavy-duty waterproof tape; Clear Gorilla Tape is a fantastic option because it’s strong and weather-resistant, but a quality duct tape can also work in a pinch. You’ll also want a thick plastic sheet or a tarp large enough to cover the entire skylight. A 5-10 mil thickness is ideal for durability. Finally, grab a tube of silicone sealant or roofing cement. Silicone is great for creating a flexible, watertight seal around the edges of your patch, providing an extra layer of protection against moisture getting through.
Must-Have Tools
You don’t need a professional-grade toolbox for a temporary fix, but a few key tools will make the job much easier and more effective. First, a caulking gun is essential for applying silicone sealant or roofing cement smoothly and evenly. Trying to squeeze it out by hand is messy and won’t give you the clean bead you need for a good seal. If you have debris like leaves, branches, or snow piled up around your skylight, a roof rake is the safest way to clear it from the ground. This ensures you have a clean, dry surface to work with before applying any patches or sealant.
Your Safety Checklist
This is the most important part of your toolkit. Never get on your roof without prioritizing safety. If you have any doubts, it’s always best to call for a professional roof inspection. If you do decide to proceed, only go up when the roof is completely dry and clear. Always wear sturdy, non-slip shoes. If you have access to safety gear like a harness, use it. Most importantly, and this can’t be stressed enough, never sit, step, or walk on the skylight itself. The glass or acrylic is not designed to support your weight and can easily break, leading to a serious fall.
How to Apply a Quick, Temporary Fix
A leaking skylight needs immediate attention to prevent water damage, but a permanent repair isn’t always possible right away. These quick, temporary fixes can help you stop the leak until a professional can assess the situation. Remember, these are stopgap measures, not long-term solutions. Your goal is to protect your home from further damage while you arrange for a proper skylight repair. Before you grab your tools, let’s talk about the most important step.
Safety First: What to Do Before You Start
This part is crucial. Working on a roof is inherently risky, and a fall from even a short height can be serious. Before you attempt any repair, make sure your ladder is on stable, level ground. Never step directly on the skylight itself; the glass or acrylic might look sturdy, but it’s often not designed to support a person’s weight. If you feel unsure or uncomfortable at any point, it’s always best to stop and call a professional. Your safety is the top priority, so always work cautiously and be aware of your surroundings.
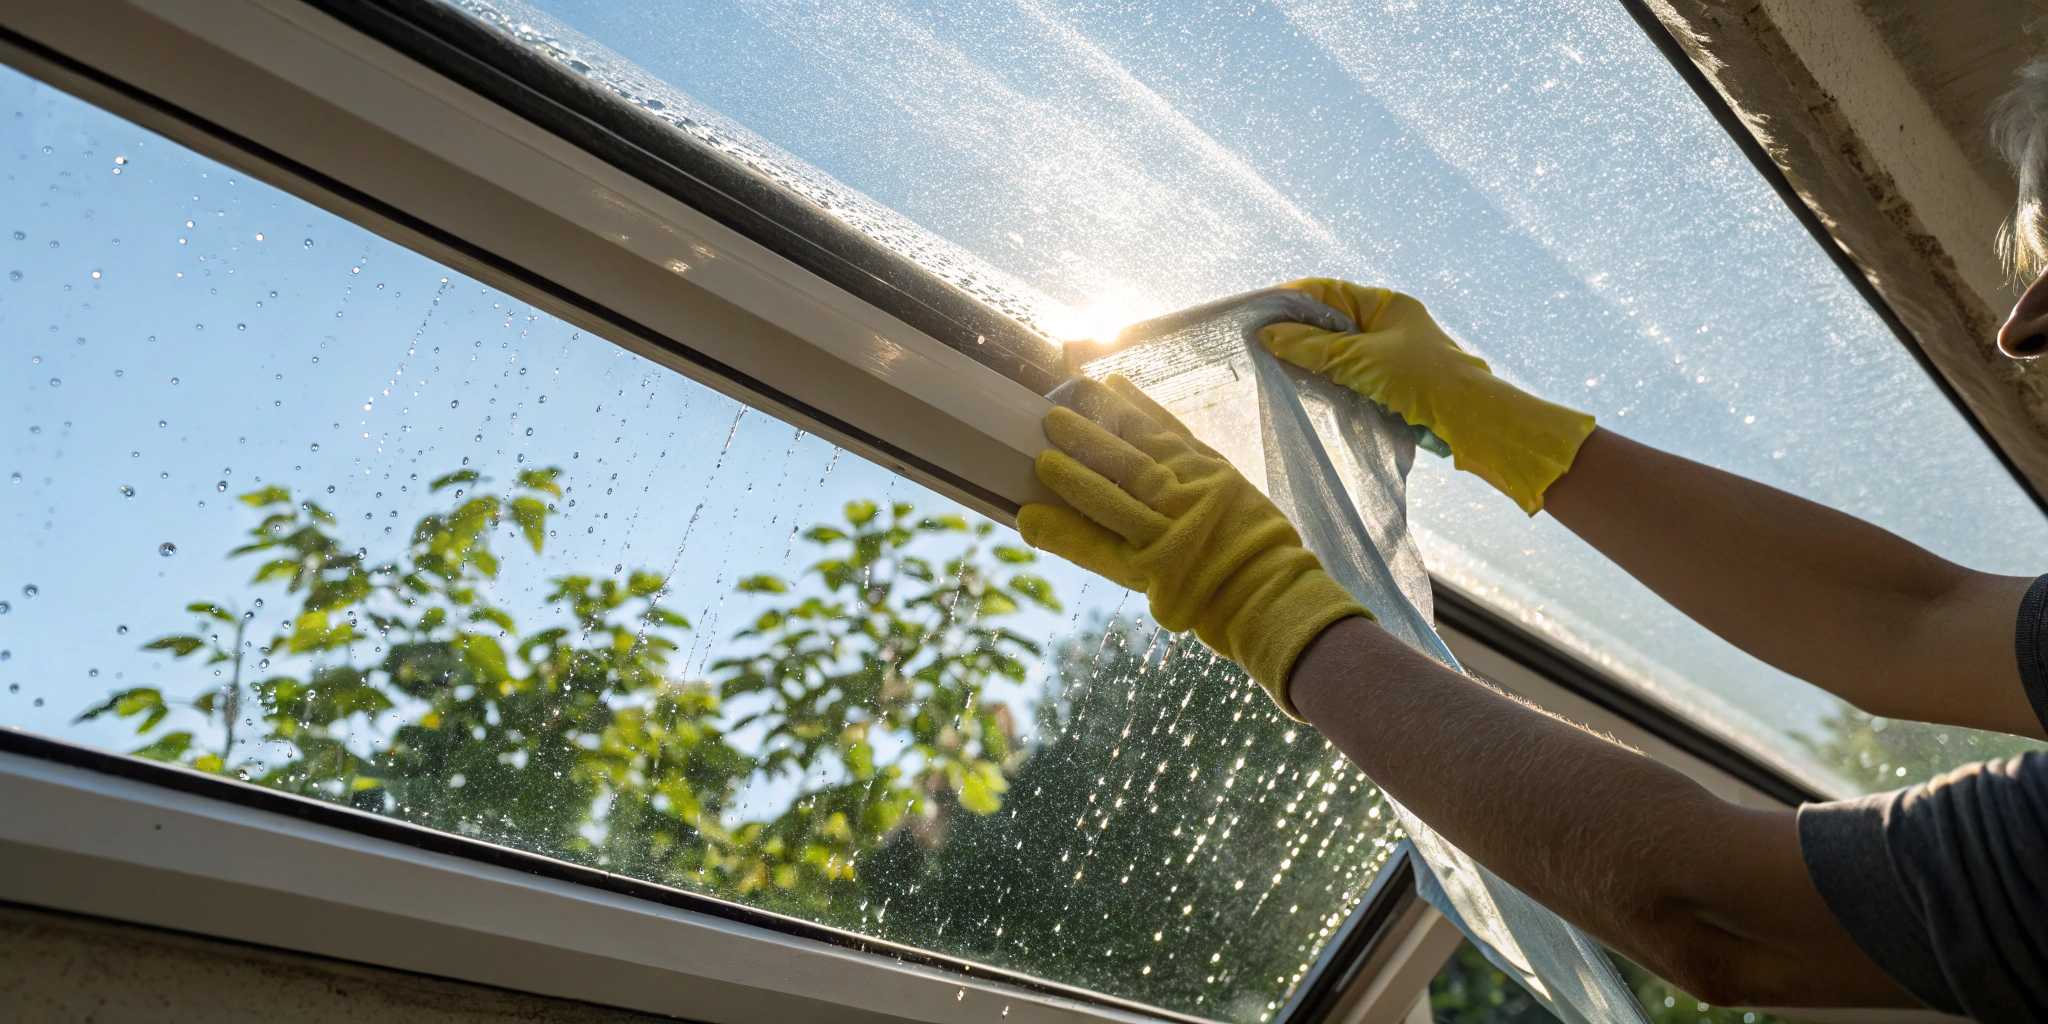
Applying Gorilla Tape
For a small crack or hole, a heavy-duty waterproof tape can be a surprisingly effective temporary patch. Clear Gorilla Tape is a popular choice because it creates a strong, watertight seal. Before you apply it, make sure the surface of the skylight is completely clean and dry—any dirt or moisture will prevent the tape from adhering properly. Cut a piece of tape that generously covers the damaged area, extending a few inches on all sides. Press it down firmly, smoothing out any air bubbles to ensure a solid seal. This simple fix can hold off a leak until you can schedule a permanent repair.
Using Flex Seal or Silicone Sealant
If the leak seems to be coming from the edges where the skylight meets the roof, a waterproof sealant can close the gap. High-quality silicone sealant is your best bet for this job. After cleaning and drying the area around the frame, apply a generous, continuous bead of sealant directly into the gap or over the old, cracked seal. Use a caulk gun for a steady application. You can then smooth the bead with a gloved finger or a caulking tool to create a seamless, waterproof barrier. This method is great for sealing small cracks and worn-out gaskets around the skylight’s perimeter.
Covering with a Tarp
When you’re dealing with a large crack or widespread damage, your best temporary solution is to cover the entire skylight with a heavy-duty tarp. Choose a tarp that is significantly larger than the skylight so it can overhang on all sides. Drape it over the skylight and smooth it down. The key is to secure it tightly so it doesn’t blow away in the wind or allow water to pool. You can use heavy objects like sandbags on the corners or secure it with ratchet straps wrapped around the skylight’s frame to keep it firmly in place until a professional can perform a roof inspection.
From Temporary Patch to Permanent Solution
A temporary fix is a great first response—it stops the immediate damage and gives you a moment to breathe. But it’s important to remember that a patch is just that: temporary. To protect your home from long-term issues like wood rot, mold, and structural damage, you’ll need to move toward a permanent solution. The next step is figuring out whether your skylight needs a professional repair or a full replacement. This decision depends on the root cause of the leak, the age of your skylight, and the extent of the damage.
Signs Your Quick Fix Is Failing
Your temporary patch might have stopped the dripping, but that doesn’t mean the problem is solved. Your skylight will give you clues that the underlying issue is still there. Keep an eye out for water stains on the ceiling or walls around the frame—if they’re spreading or getting darker, water is still getting in. A musty smell or any sign of mold is another red flag that moisture is trapped. You should also check on your patch itself. If the tape is peeling or the sealant is cracking or bubbling, its time is up. These signs mean your quick fix is failing and moisture is still compromising your roof and home.
Is It Time to Repair or Replace?
Deciding between repair and replacement depends on the age of your skylight and the extent of the damage. If your skylight is fairly new and the leak is from a minor issue like a small gap in the flashing, a professional repair might be all you need. However, some signs point directly to replacement. If you see condensation trapped between the glass panes, the seal has failed and can’t be fixed. Significant cracks in the glass, a warped or rotting frame, or persistent leaks that return after repairs are all strong indicators that it’s time for a new unit. A full replacement is often the best long-term skylight solution.
Weighing the Costs: Repair vs. Replacement
It’s tempting to choose the option with the lower price tag, and a simple repair will almost always cost less upfront. But it’s important to think about the long-term value. If your skylight is old, inefficient, or has recurring problems, paying for multiple repairs can quickly add up and may end up costing more than a replacement over time. Investing in a new, modern skylight can improve your home’s energy efficiency, lower utility bills, and give you peace of mind with a solid warranty. A professional roof inspection can give you a clear picture of the problem and help you make the most cost-effective decision for your home.
Why Call a Professional for a Permanent Fix?
Your temporary patch is a fantastic first-aid measure, but it’s not a cure. Think of it as a bandage on a wound that needs stitches. While it stops the immediate dripping, it doesn’t address the underlying injury. A leaking skylight is often a symptom of a more significant issue that, if left unchecked, can lead to costly problems like wood rot, damaged insulation, and even mold growth within your walls and attic. These issues can quietly compromise your home’s structural integrity long before you notice them.
Calling a professional is about more than just getting the leak fixed; it’s about protecting the long-term health and value of your home. A certified roofing expert has the training, tools, and experience to not only repair the visible damage but also to diagnose the root cause of the leak. They can assess the entire roofing system surrounding your skylight to ensure the flashing is integrated correctly, the seals are intact, and there’s no hidden structural damage. Investing in a professional repair provides a permanent solution and the peace of mind that comes with knowing your home is secure and protected from the elements. It’s the difference between a quick fix and a lasting one that truly safeguards your investment.
Handling Complex Structural Issues
A drip from your skylight might seem straightforward, but its origin can be surprisingly complex. The leak could be coming from a crack in the glass, but it’s just as likely to be caused by failing flashing, degraded seals, or even an improper installation that’s finally showing its effects. A professional can look for subtle clues you might miss, like small gaps around the frame or early signs of water stains spreading on the roof deck. They understand how the entire system works together and can perform a thorough roof inspection to pinpoint the exact failure point, ensuring the real problem gets fixed, not just the symptom.
Ensuring a Long-Term, Leak-Free Solution
A DIY patch with tape or sealant might hold for a little while, but it won’t stand up to changing weather and UV exposure. Professionals use high-quality, industry-grade materials that are designed to last for years, ensuring a durable and watertight seal. They also have the technical skill to apply them correctly. For instance, if you see condensation between the glass panes, it means the seal has failed and the entire unit may need attention—something a surface patch can’t fix. A professional repair is an investment in a long-term, leak-free solution that prevents future water damage and saves you from repeated repair attempts.
How Cert-A-Roof Can Help
When you spot the tell-tale signs of a skylight leak—from active dripping to visible cracks in the frame or glass—it’s time to call in the experts. At Cert-A-Roof, we specialize in comprehensive skylight services that go beyond a simple patch. Our certified technicians will conduct a detailed inspection to accurately diagnose the problem and recommend the most effective, permanent solution. Whether it’s a simple repair or a full replacement, we ensure the job is done right, integrating your skylight seamlessly with your roof for lasting protection. Don’t let a small leak turn into a major headache; let our team give you the confidence of a secure, leak-free home.
Related Articles
- 10 Warning Signs of a Roof Leak You Should Never Ignore
- Leak Fixing
- 6 Types of Commercial Flat Roofing Explained
Frequently Asked Questions
Can I just fix the leak myself and skip calling a pro? While a temporary patch is a great DIY first step, a permanent fix is a different story. The real source of a leak isn’t always where the drip appears. A professional can identify if the problem is with the flashing, the seal, or the roof structure itself. An incorrect permanent repair can trap moisture and lead to much bigger problems, so it’s best to leave the final solution to someone with the right experience and tools.
My skylight only leaks when it rains hard. Can I put off the repair? It’s tempting to ignore a leak that only shows up once in a while, but any water getting into your home is a problem. Even slow, infrequent leaks can saturate your insulation, cause wood rot in your roof deck, and create the perfect environment for mold to grow unseen. Addressing it quickly is the best way to prevent a small issue from turning into a major, expensive repair down the road.
How can I tell if my skylight just needs a repair or a full replacement? The decision often comes down to the age of the skylight and the type of problem. If your unit is relatively new and the leak is from something simple like damaged flashing, a repair is likely all you need. However, if you see condensation between the glass panes, the frame is cracked or rotting, or the skylight is over 15-20 years old, a full replacement is usually the more cost-effective and reliable long-term solution.
Will my homeowner’s insurance help pay for a leaking skylight? Coverage really depends on the cause of the leak. If the damage was caused by a sudden event like a storm or a fallen tree branch, your policy will likely cover the repairs. However, if the leak is due to old age, wear and tear, or a lack of maintenance, it typically isn’t covered. This is why documenting the damage and getting a professional inspection is so important.
Is there anything I can do to prevent my skylights from leaking in the first place? Absolutely. The best prevention is regular maintenance. A couple of times a year, make sure the area around your skylight is clear of leaves, branches, and other debris that can trap water. It’s also a great idea to have your roof professionally inspected every few years. An expert can spot and fix small issues with seals or flashing before they have a chance to cause a leak.
Comment (0)