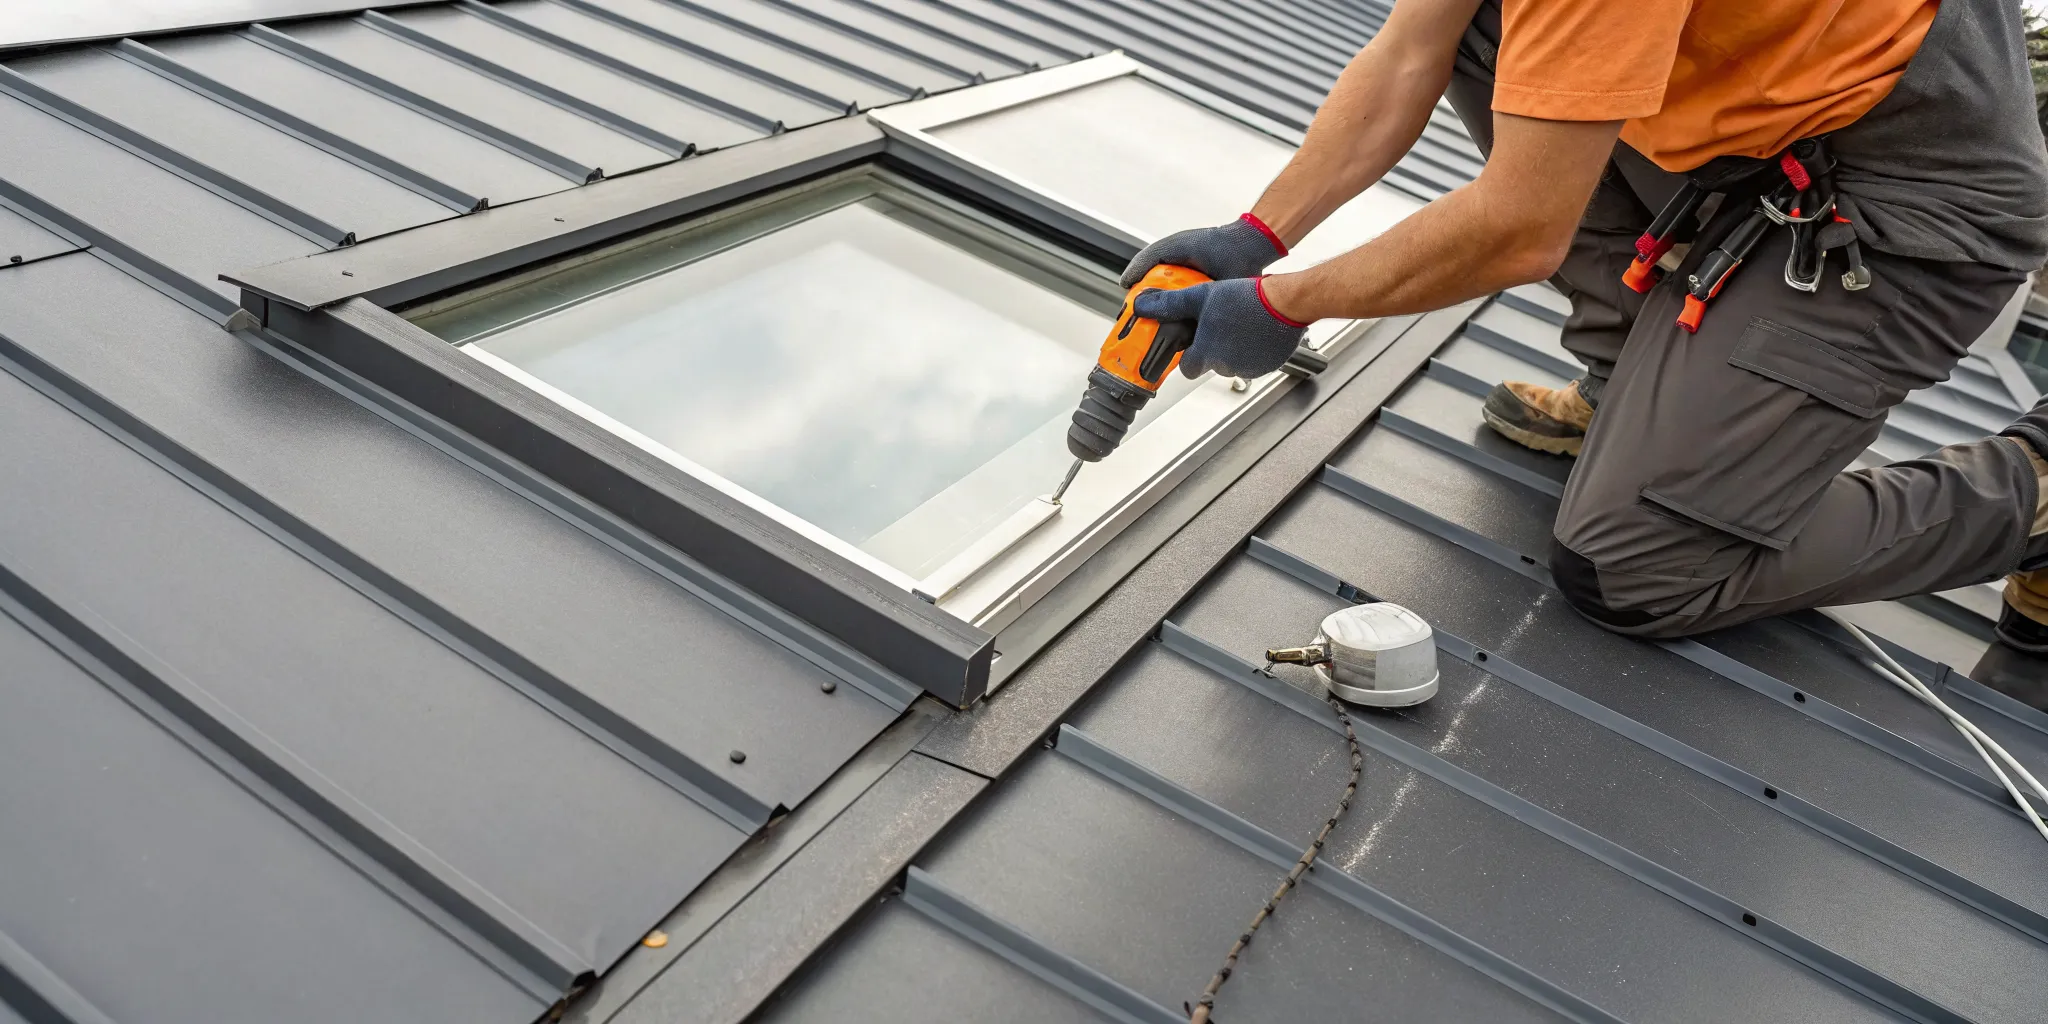
How to Fix a Leaking Skylight on a Metal Roof
A skylight on a metal roof is a fantastic feature, flooding your space with natural light. However, the combination of metal and glass requires a very specific and precise installation to remain watertight. The way metal expands and contracts with temperature changes puts unique stress on seals and flashing. When a leak develops, it’s often directly related to these factors. This guide is focused on the specific challenges of this roofing combination. We will break down the most common failure points and explain the proper techniques required to fix a leaking skylight on a metal roof, ensuring your repair is durable and effective for years to come.
Key Takeaways
- Look beyond the glass for the real culprit: Most skylight leaks originate from failing metal flashing, old seals, or improper installation, not from the glass pane itself. A careful inspection of these surrounding areas is key to finding the true source of the problem.
- Distinguish between a quick patch and a permanent fix: While emergency sealants and tarps can stop a drip during a storm, a lasting solution involves repairing or replacing the flashing and seals. For your safety and a correct repair, call a professional if the job feels unsafe or requires a full replacement.
- A simple maintenance routine is your best defense: You can prevent most future leaks by establishing a habit of clearing leaves and debris from around your skylight twice a year. This simple step prevents water from pooling and causing damage over time.
Why Is My Skylight Leaking?
Finding a drip from your skylight is frustrating, but it’s a clear signal that something needs attention. Leaks don’t just appear out of nowhere; they’re usually the result of a specific issue. The good news is that most leaks trace back to a handful of common culprits. By understanding what causes them, you can figure out the best way to stop the drip for good.
Most of the time, the problem isn’t with the skylight glass itself but with the components surrounding it. The seals, the metal flashing that integrates it into your roof, and even the area around the skylight can all be sources of a leak. Before you can think about a fix, you need to play detective and identify the root cause. A thorough roof inspection is the first step toward a dry and bright interior. Let’s walk through the most likely reasons your skylight has started leaking.
Worn-Out or Damaged Flashing
Flashing is the thin metal material installed around your skylight to direct water away from it and down your roof. Think of it as the skylight’s personal raincoat. When this flashing becomes old, rusted, or damaged by harsh weather, it can’t do its job effectively. Gaps or cracks in the flashing create a direct pathway for rainwater to seep underneath your roofing material and into your home. This is one of the most common reasons for a skylight leak, especially on older installations where the metal has been exposed to the elements for years.
Improper Installation
Unfortunately, many skylight leaks are simply due to a poor installation job from the start. A skylight needs to be perfectly integrated with the roof to remain watertight. Common installation mistakes include using the wrong type of flashing for a metal roof, relying on caulk or sealant as a primary water barrier instead of a mechanical one, or failing to secure the unit properly. If the skylight wasn’t installed with precision, it was only a matter of time before a leak appeared. This is why choosing a certified professional for any skylight services is so important.
Expansion and Contraction from Weather
Your roof and skylight are constantly exposed to changing temperatures. Here in Southern California, the intense sun heats materials during the day, causing them to expand, and the cooler nights cause them to contract. This constant cycle of expansion and contraction puts stress on the seals around your skylight. Over time, this movement can cause sealants to crack, pull away, or fail altogether, creating small openings for water to get in. What starts as a tiny, unnoticeable gap can quickly become the source of a significant leak during the next rainstorm.
Clogged Gutters and Debris
It might seem unrelated, but the condition of your roof can directly impact your skylight. If leaves, pine needles, and other debris build up on your roof, they can create dams that trap water. Instead of flowing freely off the roof, water pools around the base of your skylight. This standing water puts constant pressure on the seals and flashing, eventually finding its way through even the smallest vulnerability. Regular roof maintenance that includes clearing debris away from your skylight is a simple way to prevent this kind of problem.
Natural Wear and Tear Over Time
Even a perfectly installed skylight won’t last forever. Over many years, constant exposure to UV rays, rain, and wind takes a toll. The rubber gaskets and sealants that keep your skylight watertight will naturally degrade, becoming brittle and cracked. The frame itself can also wear down. This aging process is a normal part of any roofing component’s lifecycle. If your skylight is more than 10 or 15 years old, its leak might simply be a sign that it has reached the end of its effective lifespan and is ready for a replacement.
How Can I Find the Source of the Leak?
Finding the exact spot where water is getting in can feel like a bit of detective work. Water can travel from the entry point before it shows up as a drip or stain on your ceiling, so the source isn’t always directly above the damage. By following a few simple steps, you can narrow down the possibilities and pinpoint the problem area. Grab a flashlight, and let’s take a look.
Spotting the Telltale Signs
The most obvious clues are often the most helpful. If you see water stains on the ceiling or walls around your skylight, that’s your first red flag. Pay close attention during and right after it rains; active dripping is a sure sign of a leak. You should also look for any visible cracks in the skylight’s glass or frame. Nine times out of ten, if you see water damage near a skylight, the skylight itself is the source of the problem. These initial signs are your cue to investigate further before the issue gets worse.
Checking for Clues Inside
Before you head outside, do a thorough check from inside your home. First, you need to figure out if you’re dealing with a leak or just condensation. Condensation typically looks like fog or beads of water on the glass, while a leak will leave distinct water stains or drips. If you notice water trapped between the two panes of glass, it means the skylight’s seal has failed. Unfortunately, this isn’t a simple fix; the entire unit will need to be replaced. If you’re unsure what you’re looking at, a professional roof inspection can give you a definitive answer.
Inspecting Your Skylight from the Outside
If you can do so safely, examining the skylight from your roof can reveal a lot. Look closely at the metal flashing, which is the material that seals the joint between the skylight and the roof. Check for any cracks, gaps, or areas where the sealant has pulled away or deteriorated. The main culprits behind a leaky skylight are often poor installation or simple wear and tear on the flashing and sealant. Even small signs of damage can let a surprising amount of water in over time, so a careful visual check is essential.
Performing a Safe Water Test
If you still can’t find the source, a water test can help you confirm the leak’s location. For this, you’ll need a garden hose and a helper. Have one person stay inside to watch the skylight while the other person gently sprays water on the roof above the skylight, not directly on it. Let the water run down and over the skylight frame and flashing. This mimics rainfall and can help you see exactly where the water is getting in without causing more damage. If a drip appears inside, you’ve found your entry point.
What Are Some Quick, Temporary Fixes?
When you spot a leak, your first instinct is to stop the water from causing more damage. These quick fixes are designed to do just that. They are temporary measures to get you through a storm or until a professional can arrive. Think of them as first aid for your roof. While they can be effective in a pinch, they don’t address the underlying problem. A permanent repair is always necessary to protect your home’s integrity, so after you’ve managed the immediate issue, the next step should be to schedule a professional roof inspection.
Applying Emergency Sealant
First, you need to clean the area around the leak on your metal roof thoroughly. A clean, dry surface is key for the sealant to stick. Scrape away any old, cracked sealant or debris. Once it’s prepped, apply a generous layer of a high-quality, weatherproof sealant designed for metal roofs. You’ll want to cover the seam where the skylight meets the roof on all four sides. This creates a temporary waterproof barrier to stop the immediate drip. Remember, this is a patch, not a permanent solution, as sealants can break down over time with exposure to the elements.
Using Roof Patch Tape
Another great temporary fix is roof patch tape. This is a super-sticky, waterproof tape, often made with bitumen or a similar material, that creates an instant seal over cracks and failing seams. Just like with sealant, you need to start with a clean and dry surface. Scrape off any old tar or loose materials before you apply it. Then, cut a piece of tape that generously covers the leaky area and press it down firmly, smoothing out any air bubbles. This method is excellent for containing smaller, more defined leaks until you can get a proper roof repair scheduled. It’s a simple but effective way to keep water out.
Covering with Plastic Sheeting
If a storm is rolling in and you need to act fast, covering the skylight with heavy-duty plastic sheeting or a tarp can be a lifesaver. Drape the plastic completely over the exterior of the skylight, making sure it extends well beyond the edges. You’ll need to weigh it down securely with sandbags or bricks on the corners so it doesn’t blow away. Be very careful not to damage your roof while placing the weights. This is purely an emergency measure to prevent water from getting in during bad weather. It’s not a safe or sustainable fix, especially if you’re dealing with potential storm damage, and should be removed once the weather clears.
Catching Drips Indoors
This fix doesn’t stop the leak, but it absolutely stops the damage inside your home. As soon as you notice a drip, grab a bucket or a large bowl and place it directly underneath. This simple step protects your floors, furniture, and drywall from water stains and more serious harm. A helpful tip is to place an old towel or a sponge in the bottom of the bucket; it will absorb the impact of the drips and get rid of that annoying sound. While your bucket is on duty, it’s the perfect time to call for professional roofing services to find the real source of the problem.
How Do I Permanently Fix a Leaky Skylight?
When you’re tired of dealing with drips every time it rains, it’s time to look at permanent solutions. While temporary patches can get you through a storm, a lasting fix addresses the root cause of the leak to protect your home for years to come. These repairs are more involved and often require a deep understanding of how roofing systems work, especially with metal roofs. The goal is to integrate the skylight seamlessly with the roof, creating a watertight seal that can withstand weather and time. Depending on the source of the leak, your permanent fix could range from replacing a key component to installing a brand-new unit. For these kinds of jobs, getting professional roofing services ensures the work is done correctly and safely, giving you peace of mind.
Repairing or Replacing the Flashing
Flashing is the unsung hero of any skylight installation. It’s a layer of metal specifically shaped to direct water away from the skylight and down your roof. The number one reason skylights leak is because of failed or improperly installed flashing. For a permanent fix, the old flashing needs to be addressed. This often means carefully removing the roofing panels around the skylight to access, repair, or completely replace the flashing system. It’s a detailed process that requires precision to ensure every piece is layered correctly for a waterproof fit. A professional can assess whether your existing flashing can be repaired or if a full replacement is the better long-term investment for your home.
Fixing the Back Pan
The back pan is a critical piece of the flashing system located on the uphill side of your skylight. Its job is to catch water flowing down the roof and divert it around the sides of the unit. If this component is damaged, undersized, or was never installed correctly, water can pool behind the skylight and find its way inside. A permanent solution involves installing a new, properly sized back pan that extends under the metal roof panels. This creates a solid barrier that effectively manages water flow, even in heavy rain. Getting the back pan right is a technical step, but it’s essential for a truly leak-proof skylight.
Resealing the Entire Skylight
Over time, the seals around the skylight’s glass and frame can dry out, crack, and pull away, creating small gaps for water to enter. If the frame and flashing are in good shape, resealing the unit can be an effective permanent fix. The key is to do it correctly. First, you must completely remove the old, failed sealant to create a clean surface. Simply applying new sealant over the old stuff is a temporary patch at best. Once the area is clean and dry, you can apply a high-quality, waterproof silicone sealant to create a new, durable seal. While you’re up there, it’s also a good time to check the glass for any cracks or damage.
Replacing the Whole Unit
Sometimes, the most effective and economical long-term solution is to replace the entire skylight. If the unit is over 20 years old, has a cracked pane, or shows signs of significant frame damage like rot or corrosion, a repair might not be enough. A full replacement also allows a professional to address any underlying issues, such as water damage to the wooden frame in your roof. Installing a new, modern skylight comes with the benefit of updated technology, better energy efficiency, and a fresh factory seal. A complete roof inspection can help you determine if a full replacement is the right call for your situation.
What Tools and Materials Will I Need?
Before you climb up to your roof, it’s smart to gather everything you’ll need for the job. Having the right tools and materials on hand not only makes the repair process smoother but also much safer. Think of it like preparing your ingredients before you start cooking; a little prep work saves you from scrambling later. A successful skylight repair depends on using the correct supplies to create a durable, long-lasting seal. Let’s walk through the essential gear, materials, and tools you should have ready before you begin. This preparation is the first step toward fixing that leak for good and protecting your home from water damage.
Your Safety Gear Checklist
First things first: safety. Working on a roof requires your full attention, and the right gear is non-negotiable. Make sure you have sturdy, non-slip footwear, well-fitting work gloves to protect your hands, and safety glasses. The most important rule to remember is to never sit, step, or walk on the skylight itself. Skylights are not designed to hold a person’s weight, and putting pressure on them can lead to a serious fall and severe injury. Always work from a secure position on the roof beside the skylight, ensuring your ladder is stable and properly placed before you even begin your ascent.
The Right Repair Materials
With your safety gear sorted, it’s time to gather your repair materials. The quality of your supplies directly impacts how long your fix will last. For a leaky skylight, you’ll want to have a few key items. A high-quality, clear silicone sealant is perfect for resealing the edges of the glass. If you find that the metal flashing around the skylight is bent or rusted, you’ll need new flashing material to replace it. For sealing any gaps, a commercial-grade caulking will provide a tough, weatherproof barrier. Getting these professional-grade materials is crucial for any roofing services and ensures your repair holds up against the elements.
Essential Tools for the Job
You don’t need a massive toolbox for this project, but a few essential tools will make all the difference. You’ll definitely need a sturdy ladder to safely get on and off the roof. A caulking gun is necessary for applying your sealant and caulk with precision and control, creating a clean, even bead. Finally, a simple putty knife is incredibly useful. You can use it to scrape away old, failing sealant and to smooth out the new sealant for a perfect finish. If you find you’re missing these key items, it might be a sign to contact us and let a professional handle the job safely.
When Is It Time to Call a Professional?
Tackling a home repair yourself can be incredibly satisfying, but some jobs are better left to the experts. When it comes to your roof, knowing your limits is key to avoiding bigger problems and staying safe. If you run into any of the following situations with your leaky skylight, it’s a clear sign to put down the tools and pick up the phone. A certified roofer can provide the right roofing services to fix the problem correctly and securely.
If You Suspect Structural Damage
A small drip from your skylight can sometimes point to a much larger issue. If you notice the flashing around the unit is bent, rusted, or looks like it was installed incorrectly, it’s time for a professional opinion. Trying to fix it yourself can easily cause more damage to your roof. These signs often mean water has been getting underneath the metal panels for a while, potentially causing rot in the roof deck or structural supports. A professional has the experience to identify the full extent of the damage and ensure the underlying structure is sound before completing the repair.
When the Repair Feels Unsafe
Your safety should always come first. Getting on a roof is dangerous, especially if it has a steep pitch or is wet. You should never sit, step, or walk on a skylight, as it is not designed to support a person’s weight and could lead to a serious fall. If you feel uneasy about climbing a ladder, walking on your metal roof, or working at heights, that’s a perfectly good reason to call for help. Professionals are equipped with the proper safety gear and training to work on roofs without risk. A thorough roof inspection from a certified expert is a much safer alternative to attempting a dangerous repair on your own.
Signs You Need a Full Replacement
Sometimes, a simple repair just won’t cut it. If the skylight’s glass is cracked or the unit is more than 25 years old, it’s usually best to replace the whole thing. A new skylight is a more permanent and energy-efficient solution that will save you from future headaches. A full replacement is a complex job that involves removing the surrounding metal roofing, repairing any damaged wood underneath, and installing the new unit with proper flashing and sealing. This is a project that requires precision and expertise to ensure it’s done right, making it a clear-cut case for hiring a professional.
How Can I Prevent Future Leaks?
After you’ve fixed your leaky skylight, the last thing you want is a repeat performance. The good news is that a little proactive care can save you a lot of future headaches and expenses. Preventing leaks is all about staying ahead of potential problems with a consistent maintenance plan. By catching small issues before they escalate, you can protect your home from water damage and extend the life of your skylight and metal roof. Think of it as a simple health checkup for your home. A few minutes of inspection a couple of times a year can make all the difference, keeping your home bright, dry, and secure.
Create a Regular Maintenance Routine
The easiest way to prevent major leaks is to establish a simple maintenance routine. Leaking skylights can cause serious damage if they aren’t addressed, but many problems start small. At least twice a year, in the spring and fall, take a few minutes to clear away any leaves, branches, or other debris that have collected around your skylight. This buildup can trap water and lead to corrosion or blocked drainage paths. While you’re up there, do a quick visual check of the seals and flashing. A consistent routine helps you become familiar with your skylight’s condition, making it easier to notice when something changes. For more comprehensive care, consider our roof maintenance plans.
Use a Seasonal Inspection Checklist
To make your routine more effective, use a seasonal inspection checklist. This helps ensure you don’t miss anything important. Every year, you should carefully inspect your skylight seals for any signs of drying, cracking, or peeling. You might need to reseal them every five to ten years, depending on your climate. Also, check for condensation between the glass panes, as this can indicate a failed seal. Look closely at the flashing to make sure it’s lying flat and hasn’t lifted or bent. After a heavy storm, it’s always a good idea to run through your checklist again. A thorough roof inspection can identify these subtle issues early on.
Schedule Professional Maintenance
While DIY checks are great, some things are best left to the professionals. If you notice the flashing is bent, rusted, or looks like it was installed incorrectly, it’s time to call for help. Trying to fix complex flashing issues yourself can cause even more damage to your metal roof. A professional has the training and equipment to safely assess your entire roofing system and spot underlying problems you might miss. If you can’t pinpoint the source of a leak, a certified technician can perform a detailed diagnostic. Scheduling a professional roof certification provides peace of mind, ensuring your skylight and roof are in top condition.
Related Articles
- Leak Fixing
- 10 Warning Signs of a Roof Leak You Should Never Ignore
- 6 Types of Commercial Flat Roofing Explained
Frequently Asked Questions
How can I tell if my skylight has a leak or just condensation? This is a great question, as they can look similar at first glance. Condensation appears as a fog or even beads of water on the interior surface of the glass, usually when it’s cold outside and warm inside. A leak, on the other hand, comes from the outside. You’ll see distinct drips, water stains on the ceiling or walls around the frame, or water running down from the edges of the skylight, especially after it rains.
Is it better to repair or replace my old skylight? The answer really depends on the skylight’s age and the extent of the problem. If your unit is relatively new and the issue is a simple seal failure, a repair is often the most sensible option. However, if your skylight is over 15 years old, has cracked glass, or the frame is showing signs of rot or corrosion, a full replacement is a much better long-term investment. A new unit will be more energy-efficient and comes with a warranty, giving you peace of mind for years.
How often should I have my skylight professionally inspected? While you should perform your own visual checks twice a year, having a professional look at your skylight and the surrounding roof every three to five years is a smart, preventative move. A certified inspector can identify subtle issues with the flashing and seals that aren’t always visible to the untrained eye. This proactive approach helps you catch potential problems before they turn into costly leaks.
Will a leaky skylight cause mold? Yes, unfortunately, any unresolved leak can lead to mold. When water from a leaky skylight seeps into your ceiling, drywall, and attic insulation, it creates the damp, dark environment that mold needs to grow. This is why it’s so important to address any leak, no matter how small it seems, as soon as you spot it. A quick response protects not only your home’s structure but also your indoor air quality.
Can I fix a small leak myself? For a very minor issue, like reapplying a bit of sealant in an easy-to-reach spot, a DIY fix might seem manageable. However, most skylight leaks originate from the flashing, which is a complex component integrated with your roof. Attempting to fix it without the right experience can easily make the leak worse. If the repair requires getting on the roof or you aren’t completely certain of the cause, calling a professional is always the safest and most effective choice.
Comment (0)