Your Guide to Flat Roof Sealant Repair & Application
That persistent drip in the ceiling or the faint water stain that appeared after the last rainstorm are more than just minor annoyances; they’re warnings. On a flat roof, these are often the first signs that your sealant is failing. Ignoring them can lead to rotted wood, damaged insulation, and costly structural issues. Taking action starts with understanding what your roof needs. This guide is your complete resource for flat roof care. We’ll explore the best sealant types for your specific roof material, detail the crucial prep work that ensures a lasting bond, and explain when a DIY fix is no longer enough and it’s time to call a professional for a flat roof sealant repair.
Key Takeaways
- Proactive sealing protects your investment: Regularly applying a quality sealant is the most cost-effective way to prevent leaks, extend your roof’s life, and avoid major repairs. Watch for warning signs like cracks, interior stains, or standing water to know when it’s time to reapply.
- Preparation is the key to a lasting seal: A successful sealant application depends on proper prep work. Always start with a clean, dry surface, repair any existing damage, and choose a product that is compatible with your specific roofing material and local climate.
- Recognize when to call a professional: While small touch-ups can be a DIY task, widespread damage, safety concerns, or complex repairs require an expert. A professional roofer ensures the job is done correctly, addresses underlying issues, and provides peace of mind.
What Is Flat Roof Sealant and Why Does It Matter?
If you have a flat or low-slope roof, you know that keeping it in top shape is a priority. A flat roof sealant is a liquid coating that’s applied to your roof’s surface to create a seamless, waterproof membrane. Think of it as a protective shield for one of your property’s most important assets. Unlike sloped roofs that use gravity to shed water, flat roofs need a little extra help to prevent leaks and damage. Applying a quality sealant is one of the most effective ways to protect your investment, extend your roof’s life, and avoid costly problems. It’s a critical part of any solid roof maintenance plan, especially here in Southern California where intense sun can take a toll on roofing materials.
Protect Your Home from Water Damage
Water is the number one enemy of a flat roof. Because they don’t drain as quickly as pitched roofs, even a small amount of standing water can find its way through tiny cracks or failing seams. A minor leak can quickly escalate into major issues, causing damage to your attic, ceilings, and insulation, and even leading to mold growth. A high-quality sealant forms a monolithic, waterproof barrier that covers the entire surface, sealing up potential entry points for moisture. This proactive step is far easier and more affordable than dealing with the aftermath of water damage, making it an essential defense for your property.
Extend Your Roof’s Lifespan
Most flat roofs are designed to last for a couple of decades, but their actual lifespan depends heavily on how well they are maintained. Regular sealing is the best way to ensure you get the maximum life out of your roof. The sealant acts as a protective layer against the elements, shielding the underlying roofing material from harsh UV rays, temperature swings, and physical wear. By preventing the membrane from drying out, cracking, or becoming brittle, you can significantly delay the need for a full roof replacement. It’s a simple maintenance task that pays off for years to come.
Save Money with a Smart Maintenance Solution
When it comes to roofing, being proactive always saves you money in the long run. Applying a sealant or coating system can cost significantly less than a complete tear-off and replacement. By investing in regular sealing, you prevent small issues from turning into expensive structural repairs. Think of it as a cost-effective maintenance solution that helps you avoid the headache and high price tag of an emergency fix. Spending a bit more on a quality sealant today can reduce your future repair bills and keep your roof performing its best for longer, protecting your budget and your peace of mind.
A Guide to Flat Roof Sealant Types
Walking down the aisle of a hardware store can feel overwhelming with so many sealant options. Each type has its own strengths and is designed for different situations. Choosing the right one for your flat roof depends on your budget, local climate, and the specific material of your roof. Let’s break down the most common types so you can feel confident about what you’re putting on your home.
Acrylic: The Affordable, Reflective Choice
If you’re looking for a budget-friendly option, acrylic sealants are a great place to start. They are water-based, which makes them easy to apply and clean up. One of their biggest perks, especially here in Southern California, is their reflective quality. They bounce sunlight away from your roof, helping to keep your home cooler and potentially lowering your energy bills. Acrylics also hold up well against UV rays. The main drawback is that they aren’t as flexible as other sealants, so in areas with dramatic temperature swings, they might become brittle and crack over time.
Silicone: Flexible and Built to Last
When durability is your top priority, silicone sealants are a fantastic investment. They are incredibly flexible and can withstand extreme weather without cracking or shrinking, making them a long-lasting solution that can protect your roof for 20 years or more. Silicone is also excellent at repelling water, preventing it from pooling on your roof’s surface. On the flip side, this premium performance comes with a higher price tag. Application can also be tricky, as the roof surface must be perfectly clean for the sealant to adhere properly, often requiring professional roofing services.
Rubber: Durable and Eco-Friendly
Rubber sealants, often sold as liquid EPDM or in membrane sheets, are a solid, eco-conscious choice. They are often made from recycled materials and provide a strong, waterproof barrier once applied. Rubber is generally less expensive than silicone and offers good durability for the price. However, it can be more susceptible to punctures from falling branches or sharp debris compared to other types. Proper installation is key to ensuring a seamless, watertight finish, so it’s important to make sure the surface is prepped correctly before the sealant is glued or rolled on.
Polyurethane: The Chemical-Resistant Option
Polyurethane sealants are the heavy-duty champions of the group. They are known for creating an incredibly strong bond with almost any roofing material, from metal and wood to concrete. This makes them a versatile choice for many different types of flat roofs. They are highly durable and remain flexible, allowing them to move with your building as it settles or expands with temperature changes. Because they are so tough, they can be more difficult to apply. If you’re considering this option, it’s a good idea to get a professional opinion to ensure the job is done right.
Signs Your Flat Roof Needs a New Sealant
Your flat roof is your home’s first line of defense against the elements, but its sealant won’t last forever. Catching problems early is the key to preventing a small issue from turning into a major headache. If you know what to look for, you can spot the warning signs that your sealant is failing and take action before serious damage occurs. Pay attention to these four key indicators that your flat roof might be due for some professional attention.
Look for Cracks, Blisters, or Splits
One of the most straightforward signs of sealant failure is visible damage on the roof’s surface. Take a look at your roof, paying close attention to any areas that look cracked, split, or bubbled up like a blister. These issues often happen after years of sun exposure and temperature changes cause the material to become brittle. Even a tiny crack can allow water to seep underneath, leading to rot and structural problems. If you spot this kind of damage, it’s a clear signal that the protective barrier is compromised and needs a roof repair before the next rainstorm.
Spotting Water Leaks and Interior Stains
Sometimes, the first sign of a roofing problem appears inside your home. Have you noticed any yellowish or brown stains on your ceilings or walls? What about paint that’s starting to peel or bubble? These are classic signs of a water leak. Even if you can’t see an active drip, these stains mean moisture is getting in somewhere. A small leak can lead to significant issues like damaged insulation, weakened drywall, and even mold growth. Don’t ignore these clues. A professional roof inspection can trace the source of the leak and determine if failing sealant is the culprit.
Noticing Ponding Water After Rain
Flat roofs are designed with a slight slope to allow for drainage, but they can still have issues. After it rains, check your roof for any standing puddles. If you see water that sits for more than 48 hours, you have what’s known as “ponding water.” This is a major red flag. The constant weight of the water puts stress on your roof’s structure and can rapidly break down the sealant. Over time, this can lead to serious leaks and deterioration of the roofing material itself. Ponding water often indicates that the sealant has degraded or that there are underlying drainage problems that need to be addressed.
Checking for a Worn Membrane and Bad Seams
The most vulnerable spots on any roof are the seams and areas where objects protrude through the surface. This includes places around vents, pipes, skylights, chimneys, and where the roof meets a wall. The sealant in these areas is constantly stressed as different materials expand and contract at different rates. Over time, these seams can pull apart or the membrane can wear thin, creating a direct path for water to enter. Regularly checking these critical points is an essential part of roof maintenance. If the sealant looks pulled, cracked, or worn away, it’s time to get your roofing services scheduled.
How to Choose the Right Flat Roof Sealant
Picking the right sealant can feel like a big decision, but it doesn’t have to be complicated. The best choice for your flat roof comes down to a few key factors: your local weather, your roof’s material, and your long-term goals. Thinking through these points will help you find a solution that protects your property for years to come.
Consider Your Local Climate and Sun Exposure
Here in Southern California, our roofs face a lot of direct sunlight and intense UV rays. While we love the sunny weather, it can be tough on roofing materials. A good sealant needs to be UV-stable to prevent it from breaking down over time. Flat roofs also have a slight slope, but they don’t drain as quickly as pitched roofs, making them more vulnerable to ponding water after a rainstorm. That’s why you need a sealant with excellent waterproofing capabilities. Choosing a product designed to withstand both constant sun exposure and potential standing water is the first step toward a durable, long-lasting roof repair.
Match the Sealant to Your Roof Material
Not all sealants are created equal, and they definitely aren’t one-size-fits-all. The material of your flat roof, whether it’s metal, concrete, EPDM rubber, or modified bitumen, will determine which sealant will bond correctly. For example, polyurethane sealants are fantastic for their strong adhesion to materials like wood and metal. Silicone-based sealants are known for their incredible flexibility and durability, making them a great match for various surfaces, especially in areas with temperature swings. Always check the product label to confirm it’s compatible with your specific roofing material. Using the wrong type can lead to poor adhesion and premature failure, putting you right back where you started.
Assess Durability and Flexibility Needs
Your roof is constantly expanding and contracting with temperature changes throughout the day. A sealant needs to be flexible enough to move with your roof without cracking or splitting. This is especially important around seams, joints, vents, and skylights, where movement is most common. For these vulnerable spots, you might even consider using reinforcing fabric or seam tape along with the sealant for extra strength. The best sealants are engineered to remain pliable for years, providing continuous protection against the elements. A durable, flexible seal is your best defense against leaks and the costly water damage that can follow.
Balance Upfront Cost with Long-Term Value
It can be tempting to go for the cheapest sealant on the shelf, but it’s important to think about the long-term picture. A high-quality sealant might cost more initially, but it can save you a significant amount of money down the road by reducing the need for frequent repairs. Think of it as an investment in your property’s health. A premium product will last longer and perform better, giving you peace of mind. In many cases, applying a quality coating system can cost about half as much as a full roof replacement. A professional roof inspection can help you understand your roof’s condition and make the most cost-effective decision.
Prepping Your Flat Roof for a New Sealant
Applying a new sealant isn’t just about pouring it on and spreading it around. The secret to a durable, long-lasting finish lies in the prep work. Taking the time to properly prepare your roof surface ensures the sealant will adhere correctly and provide the best possible protection. Think of it like painting a wall; you wouldn’t just paint over dirt and peeling paint, right? The same principle applies here. A clean, smooth, and dry surface is the perfect canvas for your new sealant. These steps will guide you through creating that ideal foundation for a successful application.
Thoroughly Clean the Roof Surface
First things first, you need a spotless surface. Start by sweeping or using a leaf blower to clear away any loose debris like leaves, dirt, and twigs. Once the big stuff is gone, it’s time for a deeper clean. You can use a pressure washer on a low setting or a stiff-bristled brush with a roof-safe cleaning solution to scrub away any ground-in dirt, algae, or grime. After washing, rinse the roof thoroughly with clean water. The most important part of this step is patience. You must let the roof dry completely before moving on, as trapping moisture under the sealant will cause it to fail. A comprehensive cleaning is a key part of any good roof maintenance plan.
Remove Old Sealant and Debris
With the roof clean, your next focus is removing any old, failing sealant. Look for areas where the previous coating is cracking, bubbling, or peeling away from the surface. Use a putty knife, scraper, or utility knife to carefully lift and remove these damaged sections. Your goal is to get rid of anything that could prevent the new sealant from forming a tight bond with the roof membrane. You want the surface to be as smooth and stable as possible. If you encounter stubborn patches, gentle heat from a handheld torch can sometimes help, but this is a task best left to professionals due to the high risk of fire. If you’re unsure, it’s always safer to contact us for help.
Repair Any Existing Cracks or Damage
Applying sealant over existing damage is like putting a bandage on a broken bone; it doesn’t fix the underlying issue. Before you apply a new coat, inspect the entire roof for cracks, holes, or compromised seams. For minor issues, a high-quality roofing cement or caulk can fill the gaps. For larger cracks or areas with significant wear, you’ll need a more robust solution. This often involves applying a layer of roofing cement, embedding a strip of reinforcing fabric mesh into it, and then covering the mesh with a second layer of cement. This process creates a strong, flexible patch that moves with your roof. Addressing these problems first ensures your new sealant has a solid base to protect. If the damage seems widespread, a professional roof repair is your best bet.
Check the Weather Forecast
Your final prep step is to become a bit of a meteorologist. The weather plays a huge role in how well your sealant applies and cures. You’ll need a string of clear, dry days to get the job done right. Applying sealant right before it rains is a recipe for a washed-out mess. Temperature is also a major factor. Most sealants have an ideal application temperature range, typically between 35°F and 120°F, but always check the manufacturer’s instructions on the product you’re using. Applying sealant when it’s too cold can make it thick and difficult to spread, while extreme heat can cause it to dry too quickly, leading to bubbles and an uneven finish. Planning around the weather forecast is a simple step that makes a world of difference.
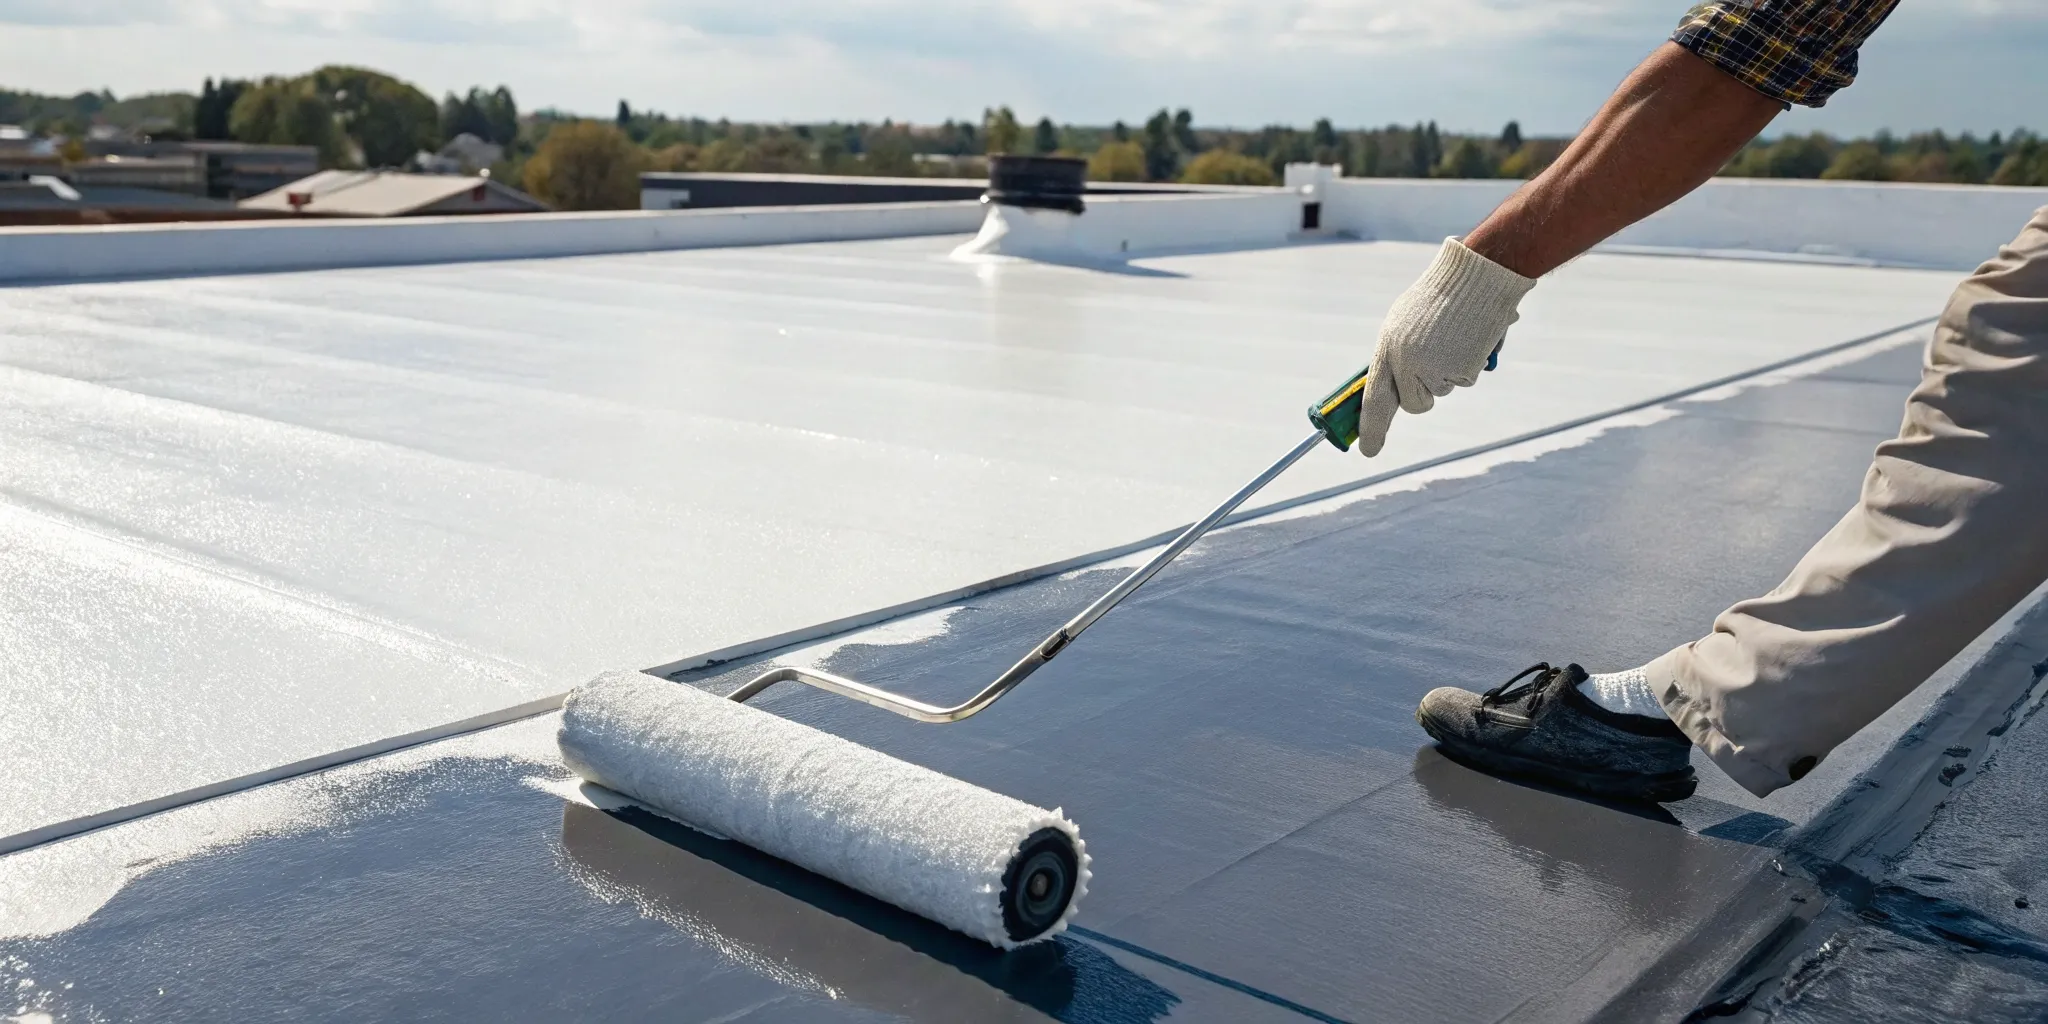
Applying Flat Roof Sealant Like a Pro
Once you’ve prepped your roof, you’re ready for the main event: applying the sealant. This is where your hard work pays off, creating a seamless, waterproof barrier that protects your property. Taking your time and being methodical here is key. A careful application ensures you get the best possible protection and extend the life of your roof. Let’s walk through the process step-by-step to make sure you get a professional-quality finish. With the right approach, you can create a durable seal that stands up to the elements for years to come.
Gather Your Tools: Brushes, Rollers, and Sprayers
Before you start, make sure you have the right tools for the job. The type of sealant you choose and the size of your roof will determine what you need. For most DIY projects, a simple paintbrush and a paint roller with an extension pole will work perfectly. Use the brush for cutting in around edges, vents, and other tricky spots. The roller is great for covering the large, open areas of the roof quickly and evenly. If you’re tackling a very large commercial roof, an industrial paint sprayer can make the job much faster, but it requires more setup and experience to use correctly.
Follow a Step-by-Step Application Process
Proper application starts long before you open the can of sealant. Your roof surface must be completely clean, dry, and stable. First, sweep away any leaves, dirt, and loose debris. Then, wash the surface thoroughly and give it plenty of time to dry. If you find any minor cracks or damage during this stage, now is the time to fix them. Applying sealant over a dirty or damaged surface will prevent it from adhering properly, which can lead to peeling and leaks down the road. For anything more than a hairline crack, it’s wise to get a professional opinion on the necessary roofing services before you proceed.
Get the Right Coverage and Number of Coats
Don’t be tempted to slap on one thick coat and call it a day. Most sealants require three to four thinner coats to build up a strong, waterproof membrane. Check the product label for the recommended coverage rate, which is usually measured in square feet per gallon. This will help you calculate how much sealant you need to buy. Applying multiple coats ensures you don’t miss any spots and allows you to build the sealant to the proper thickness for maximum durability. Always allow each coat to dry completely according to the manufacturer’s instructions before applying the next one.
Use Primer and Fabric for Major Repairs
If you’re dealing with larger cracks, failing seams, or areas with significant wear, sealant alone might not be enough. For these situations, you’ll want to use a reinforcing fabric. This special polyester fabric is embedded between coats of sealant over the damaged area. It acts like a bridge, adding strength and flexibility to the repair and preventing the crack from reopening. Some roofing systems may also require a specific primer to ensure the sealant bonds correctly to the existing roof material. Using these extra materials for bigger repairs helps create a more robust, long-lasting fix.
Common Sealant Application Mistakes to Avoid
Applying a flat roof sealant can feel like a simple weekend project, but a few common errors can lead to a weak seal that fails much sooner than it should. Getting the application right the first time saves you from future headaches, water damage, and repeat repairs. To help you achieve a durable, waterproof finish, let’s look at the most frequent mistakes homeowners make and, more importantly, how you can easily avoid them. By paying attention to these details, you can protect your investment and keep your roof in top condition for years to come.
Don’t Skip Surface Prep
Think of applying sealant like painting a room: you wouldn’t just paint over a dirty, cracked wall. The same principle applies to your roof. A clean, smooth surface is essential for the sealant to bond correctly and create a watertight barrier. Before you even open the can, take the time to thoroughly sweep away leaves, dirt, and any loose debris. After that, wash the surface and allow it to dry completely. If you find any existing cracks or damage, you’ll need to repair them first. For some surfaces, a primer is also necessary to ensure the best possible adhesion. Skipping this step is one of the fastest ways to guarantee a failed application.
Avoid Applying in the Wrong Weather
Sealant is sensitive to its environment, especially while it’s curing. Applying it in the wrong weather conditions can ruin the finish. Most sealants perform best in mild, dry weather, typically between 50°F and 70°F. If it’s too hot, the sealant can dry too quickly, leading to cracks and bubbles. If it’s too cold, it may not cure properly at all. Rain is an obvious no-go, but high humidity can also be a problem, as the excess moisture in the air can prevent the sealant from sticking. Always check the forecast before you start. A professional roofing service will always schedule work around the weather to ensure a perfect, long-lasting application.
Never Use an Incompatible or Expired Sealant
The sealant aisle can be overwhelming, but grabbing the wrong product is a costly mistake. Different roofing materials require different types of sealant, so make sure the one you choose is compatible with your roof. Using an incompatible product can result in a weak bond that peels away or fails to seal leaks. It’s also crucial to check the expiration date on the container. Expired sealant can lose its effectiveness and won’t provide the protection you need. For tricky areas with a lot of movement, like joints, vents, or seams, consider using reinforcing fabric or seam tape along with the sealant to create a stronger, more flexible seal.
Don’t Rush the Curing Time
Once the sealant is applied, the waiting game begins. It’s tempting to check on your work or get back to using your rooftop space, but walking on the surface before it has fully cured can compromise the waterproof barrier you just created. Always follow the manufacturer’s instructions for curing time, which is usually between 24 and 48 hours. Keep in mind that this timeline can change based on the weather; cooler temperatures or higher humidity can slow the process down. Giving the sealant the uninterrupted time it needs to set is a simple but critical step for a successful repair. If you have any doubts, it’s always best to contact a professional for guidance.
Making Your Flat Roof Sealant Last
Applying a new sealant is a great step, but the job isn’t finished once the last coat is on. To get the most out of your hard work and investment, you need to ensure the sealant cures properly and is well-maintained over time. A little proactive care goes a long way in preventing leaks and extending the life of your roof.
Think of it like this: you wouldn’t buy a new car and then skip the oil changes. Your roof sealant needs the same kind of attention to perform its best for years to come. By following a few key practices, you can maximize its durability and protective qualities, keeping your property safe and dry. These simple habits will help you avoid premature failures and costly future repairs, giving you peace of mind every time it rains.
Follow the Manufacturer’s Instructions
Every sealant product is slightly different, and the manufacturer’s instructions are your roadmap to a successful application. These guidelines aren’t just suggestions; they are based on the specific chemical makeup of the product. Pay close attention to the section on surface preparation. The most common reason a sealant fails is because it was applied to a dirty or damp surface. Always make sure your roof is completely clean and dry before you begin. Following these steps ensures the sealant will bond correctly and provide a durable, long-lasting barrier against the elements.
Allow for Proper Curing Time
Patience is key after applying your sealant. Most products need between 24 and 48 hours to cure fully, which means the chemical process that makes the sealant tough and waterproof is still happening. During this time, it’s critical to avoid walking on the roof or placing anything on the surface. Any pressure or disturbance can create weak spots or prevent the sealant from bonding properly, compromising its ability to protect your roof. Check the product label for the specific curing time and plan to keep the roof clear until it has completely set.
Stick to a Regular Maintenance Schedule
Sealing your roof isn’t a one-and-done task. Over time, the sun, rain, and temperature changes will wear down the sealant. Sticking to a regular re-sealing schedule is the best way to keep your flat roof protected from leaks. The frequency depends on your roof material. Here’s a general guide to follow:
- Asphalt: Reapply every 3 to 5 years.
- EPDM Rubber: Reapply every 5 to 7 years.
- Metal: Reapply every 7 to 10 years.
Setting a reminder on your calendar can help you stay on top of your roof maintenance and catch potential issues before they become major problems.
Understand How the Environment Affects Your Sealant
Weather plays a huge role in how well your sealant applies and lasts. Most sealants work best in mild temperatures, typically between 50°F and 70°F. Applying it when it’s too hot can cause it to dry too quickly and crack, while cold weather can prevent it from curing correctly. Rain and high humidity are also enemies of a fresh coat, as moisture can stop the sealant from sticking. Because flat roofs don’t shed water as easily as sloped ones, it’s even more important to ensure the sealant creates a perfect waterproof barrier, which is why a professional roof inspection can help identify the best approach for your specific climate.
When to Call a Professional Roofer
While applying sealant can be a manageable DIY project for minor touch-ups, it’s important to know when to step back and call in a professional. Some roofing issues are more than skin-deep, and a quick fix might only mask a more serious problem. Handling extensive damage or working at heights without the right experience can be risky for both you and your home. If you’re facing a major repair, have safety concerns, or simply want the assurance that the job is done right, trusting a professional is always the best choice.
The Damage Is Too Extensive for a DIY Fix
A small crack or a worn seam is one thing, but widespread damage is a clear sign to call for backup. If your flat roof is old, has large or multiple leaks, or shows significant blistering and splitting across its surface, a simple sealant application won’t be enough. These are often symptoms of a deeper issue, like trapped moisture or a failing roof membrane. A qualified roofing contractor can perform a more serious roof repair, assessing the underlying structure and ensuring the root cause is addressed. Attempting to patch up extensive damage yourself could lead to bigger, more expensive problems down the road.
You Have Concerns About Safety or Access
Your personal safety should always come first. Working on any roof involves risks, from climbing ladders to handling materials at a height. If your roof is steep, difficult to access, or if you’re not comfortable working at heights, it’s wise to leave the job to a professional. Trained roofers have the proper safety equipment, training, and experience to work securely. For larger or more serious roof damage, getting help from a professional team like ours at Cert-A-Roof eliminates the risk of personal injury and ensures the job is completed safely and efficiently, without you ever having to step on a ladder.
You Want a Certified Inspection and Peace of Mind
Sometimes, you just want the confidence that comes with a job done right. A professional roofer offers more than just labor; they provide expertise. Experts can correctly identify and fix problems, follow local building codes, and deliver results that last. A certified roof inspection can uncover hidden issues you might miss, preventing small problems from turning into major headaches. Plus, professional work often comes with a warranty, giving you long-term protection and peace of mind. A DIY fix can’t offer that same level of assurance.
Related Articles
- 6 Types of Commercial Flat Roofing Explained – Cert-A-Roof Roof Inspections
- The 4 Main Types of Commercial Roofing Systems – Cert-A-Roof Roof Inspections
- Leak Fixing – Cert-A-Roof Roof Inspections
Frequently Asked Questions
How often should I reseal my flat roof? The ideal frequency depends on your specific roofing material. Generally, an asphalt roof might need a new coat every 3 to 5 years, while a more durable material like EPDM rubber or metal can often go 5 to 10 years. The best practice is to inspect your roof annually, especially after big storms, so you can catch any signs of wear before they turn into leaks.
Can I apply new sealant directly over the old layer? It’s tempting to save time, but you should never apply new sealant over an old, failing coat. If the existing layer is cracking or peeling, the new sealant won’t be able to form a strong, watertight bond with the roof itself. Taking the time to remove any loose material and thoroughly clean the surface is the most important step for ensuring your new seal lasts.
What type of sealant is best for a roof in Southern California? With our year-round sun, a sealant with strong UV stability is a must. Reflective sealants, such as many acrylic or silicone-based products, are an excellent choice for our climate. They do a great job of bouncing solar rays away from your building, which helps protect the roofing material and can even help keep your home a bit cooler during the summer.
My roof has some standing water after it rains. Will sealant fix this? Sealant creates a waterproof barrier, but it doesn’t solve the root cause of ponding water. Standing water usually indicates a problem with drainage or a low spot in the roof’s structure. While sealant can protect the surface from immediate leaks, the constant pressure from the water will cause it to wear out much faster. It’s best to have a professional address the drainage issue first.
Is sealing my roof something I can do myself? If you’re just touching up a small, accessible area and are comfortable working at heights, a DIY application can be manageable. However, for widespread issues, multiple leaks, or if you have any safety concerns, calling a professional is the smartest move. An expert can spot underlying problems you might miss and will have the right tools and safety gear to get the job done right.
Comment (0)